Hosting Ente with Terraform, Vault, and NixOS
September 27, 2025•12,083 words

Ente is a platform to host photos that uses end-to-end encryption to store its data.
I have more than a decade of photos saved with Google Photos, but I wanted to keep them in a place that is designed to be private. The problem, however, was that the collection grew to a few terabytes over the years, and putting them on a privacy-respecting image platform was either very expensive or outright impossible. To work around the problem, I decided to self-host Ente.
Table of contents
- The plan
- Setting up secret management with Vault
- Bootstrapping (the imperative part)
- Bootstrapping (the declarative part)
- Deploying Ente (the imperative part)
- Deploying Ente (the declarative part)
- Post-installation configurations
- Finishing up
Note that following the links above, even though they point to the same page, still performs a full page load (at least at the time of writing). I suspect it has something to do with how this blogging platform was implemented, but I have not looked deeper into it.
The plan
The infrastructure
Unlike the PeerTube instance I self-hosted, which is only reachable via Tailscale, I wanted my image platform to be accessible via the internet (because Android cannot connect to Tailscale and my VPN service simultaneously). The easiest way for me to expose a service to the internet was by using a cloud provider, which I eventually ended up doing.
To run the service, the following cloud providers were used:
- Amazon Web Services: for a virtual private server (Amazon Lightsail) for hosting Ente's Museum (API server), web server, and a PostgreSQL database instance
- Backblaze B2: for managed object storage
I initially considered OVHcloud for a VPS, but the order for one was cancelled without a satisfying explanation. It is apparently not an isolated incident; rather than trying to sort it out, I switched to Amazon Web Services instead. I initially hesitated to do so, probably due to my baseless reluctance to use something from a US tech giant, but I thought I will learn more about it and make an educated decision in the future.
Another thing I have considered was using a dedicated database instance, which I felt could be a safer place to store data. My naive self thought I will not be using the service often enough, used Scaleway's Serverless SQL Database, and finished deploying with it, only to realise its true cost a week later. I changed my plan and decided to run database locally within the Lightsail instance, while separating its persistent data using a Lightsail disk.
Using code for almost everything
Ente provides a simple script from their guide to quickly start up a self-hosted server. However, even though I could just run the script and add a few tweaks to get the server running, I did not want to imperatively do so and repeat the process in case the system malfunctions.
Fortunately for me, Nixpkgs (which implements NixOS) contains modules that can help run the service in a simple manner. With them, I could make the system declarative (down to the disk layout) and practically stateless.
This was also an opportunity for me to expand my knowledge. NixOS allowed me to manage an operating system with code, and with Terraform, I could extend this ability to infrastructure management.
Setting up secret management with Vault
I typically use Sops to encrypt secrets, which then end up in a Git repository. However, with Terraform involved, I knew it will be a pain to update secrets that way. A way to dynamically retrieve them was needed, and I chose Vault, another product from HashiCorp, to do so.
Hosting Vault
I initially wanted to lessen the maintenance burden by using a managed Vault instance. However, upon checking the price for a Vault Dedicated cluster, I realised that it was an overkill for my use case. As a result, I chose to host one myself.
After facing difficulties with installing NixOS on low-end Lightsail instances, I switched to DigitalOcean Droplets. To create one with NixOS, I had to upload an image with my configuration applied.
Preparing NixOS configurations
I have already written NixOS configurations before, so I did not have to write everything from scratch. However, my goal was to make the new system more declarative than before, so impermanence (for controlling which data stays across reboots) and disko (for declarative partitioning) were set up.
Implementing impermanence was not difficult, though I had to consider my existing non-impermanent system that was not ready for impermanence just yet. I added an input at flake.nix and created a module persistence.nix for host-agnostic configurations, containing a few directories that should not be wiped every boot.
{
  # Flake description...

  inputs = {
    # Preceding flake inputs...

    # Used for declaration of impermanent systems
    impermanence.url = "github:nix-community/impermanence";

    # Succeeding flake inputs...
  };

  # Flake outputs follow...
}
{ inputs, ... }:
{
  imports = [ inputs.impermanence.nixosModules.impermanence ];

  environment.persistence = {
    # Enable persistence storage at /persist
    "/persist" = {
      # Prevent bind mounts from being shown as mounted storage
      hideMounts = true;

      # Create bind mounts for given directories
      directories = [
        "/var/lib/nixos"
        "/var/lib/systemd"
        "/var/log"
      ];
    };
  };

  # Require /persist for booting
  fileSystems."/persist".neededForBoot = true;
}
Using disko was next. The configuration at Vault-specific disko-config.nix contains declaration of an EFI system partition, a tmpfs mounted at /, and a Btrfs partition, with a swap file and subvolumes to be mounted at /nix and /persist.
{
  disko.devices = {
    disk = {

      # Primary disk
      main = {
        type = "disk";
        device = "/dev/vda";
        imageSize = "4G";

        # GPT (partition table) as the disk's content
        content = {
          type = "gpt";

          # List of partitions
          partitions = {
            # BIOS boot partition
            boot = {
              priority = 100;
              size = "1M";
              type = "EF02";
            };
            # EFI system partition
            esp = {
              priority = 100;
              end = "500M";
              type = "EF00";

              # FAT filesystem
              content = {
                type = "filesystem";
                format = "vfat";
                mountpoint = "/boot";
                mountOptions = [
                  "defaults"
                  "umask=0077"
                ];
              };
            };

            # Root partition
            root = {
              size = "100%";

              # Btrfs filesystem
              content = {
                type = "btrfs";

                # Override existing partition
                extraArgs = [
                  "-f"
                ];

                # Subvolumes
                subvolumes = {
                  # /nix
                  "/nix" = {
                    mountOptions = [
                      "defaults"
                      "compress=zstd"
                      "x-systemd.growfs"
                    ];
                    mountpoint = "/nix";
                  };

                  # Persistent data
                  "/persist" = {
                    mountOptions = [
                      "defaults"
                      "compress=zstd"
                    ];
                    mountpoint = "/persist";
                  };

                  # Swap file
                  "/var/swap" = {
                    mountpoint = "/var/swap";
                    swap = {
                      swapfile.size = "1G";
                    };
                  };
                };
              };
            };
          };
        };
      };
    };

    nodev = {
      # Impermanent root with tmpfs
      "/" = {
        fsType = "tmpfs";
        mountOptions = [
          "defaults"
          "size=25%"
          "mode=0755"
        ];
      };
    };
  };
}
For /, it was important to note that tmpfs mounts with a default permission of 1777. It worked fine in practice, but the SSH daemon refused to operate in certain cases. The solution, as this online discussion pointed out, was to add a mount option mode=0755, which is the permission / is expected to have.
Encrypting secrets with Sops
For Vault itself, just like when I installed NixOS for the first time, sops-nix was used to encrypt my secrets.
A new age key for the new instance was first generated; it was to be copied over later on.
[lyuk98@framework:~]$ nix shell nixpkgs#age
[lyuk98@framework:~]$ age-keygen --output keys.txt
Public key: age1p0rc7s7r9krcqr8uy6dr8wlutyk9668a429y9k27xhfwtgwudgpq9e9ehq
I edited existing .sops.yaml to add the new public key and specify where the secrets will be.
keys:
  # Hosts
  - &hosts:
    - &vault age1p0rc7s7r9krcqr8uy6dr8wlutyk9668a429y9k27xhfwtgwudgpq9e9ehq

creation_rules:
  # Secrets specific to host "vault"
  - path_regex: hosts/vault/secrets.ya?ml$
    key_groups:
    - age:
      - *vault
After adding a few secrets to a file, I encrypted it using sops.
[lyuk98@framework:~/nixos-config]$ sops encrypt --in-place hosts/vault/secrets.yaml
Setting up Tailscale
I did not feel that the instance needs to be exposed to the internet, so I used Tailscale to limit access. I could run tailscale up and connect to tailnet manually, but I wanted to automate this process.
For NixOS, automatic startups can be achieved by providing an option services.tailscale.authKeyFile, and I needed an OAuth client with auth_keys scope for that. Moreover, for clients to be given such a scope, they also needed to be assigned one or more tags. From the visual access controls editor, I added tags named museum and vault. Some existing tags that I have previously created while working on PeerTube (ci and webserver) were also to be used later on.
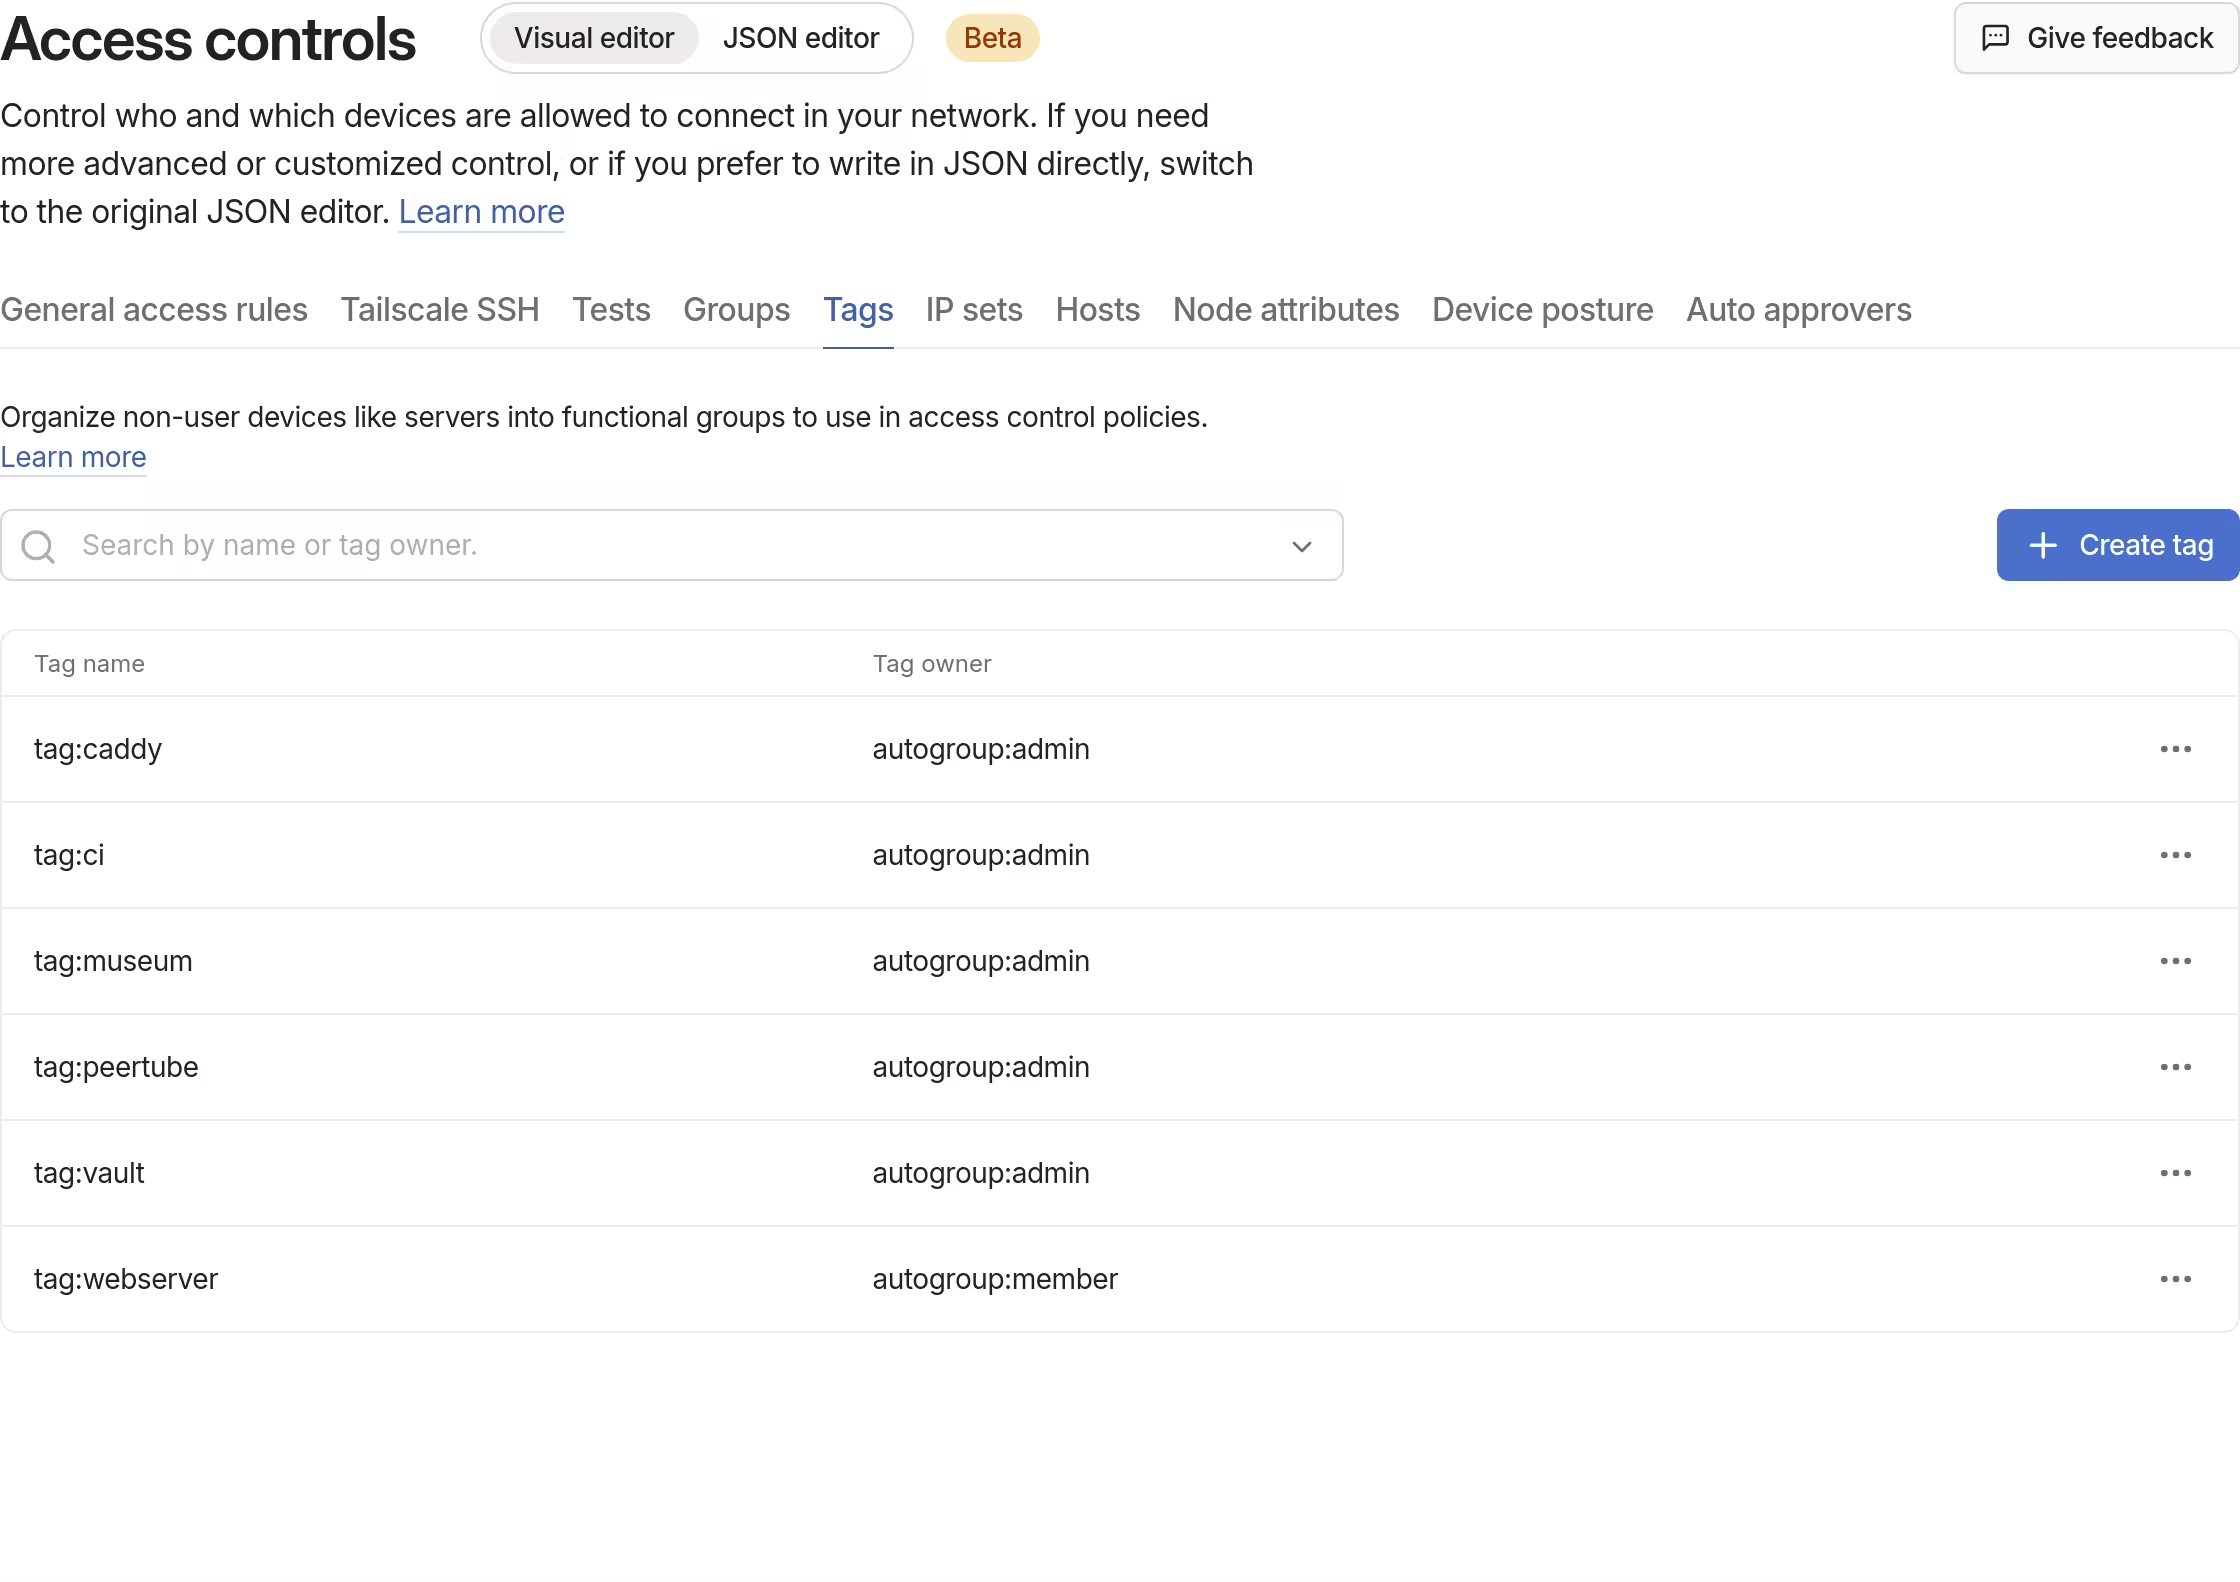
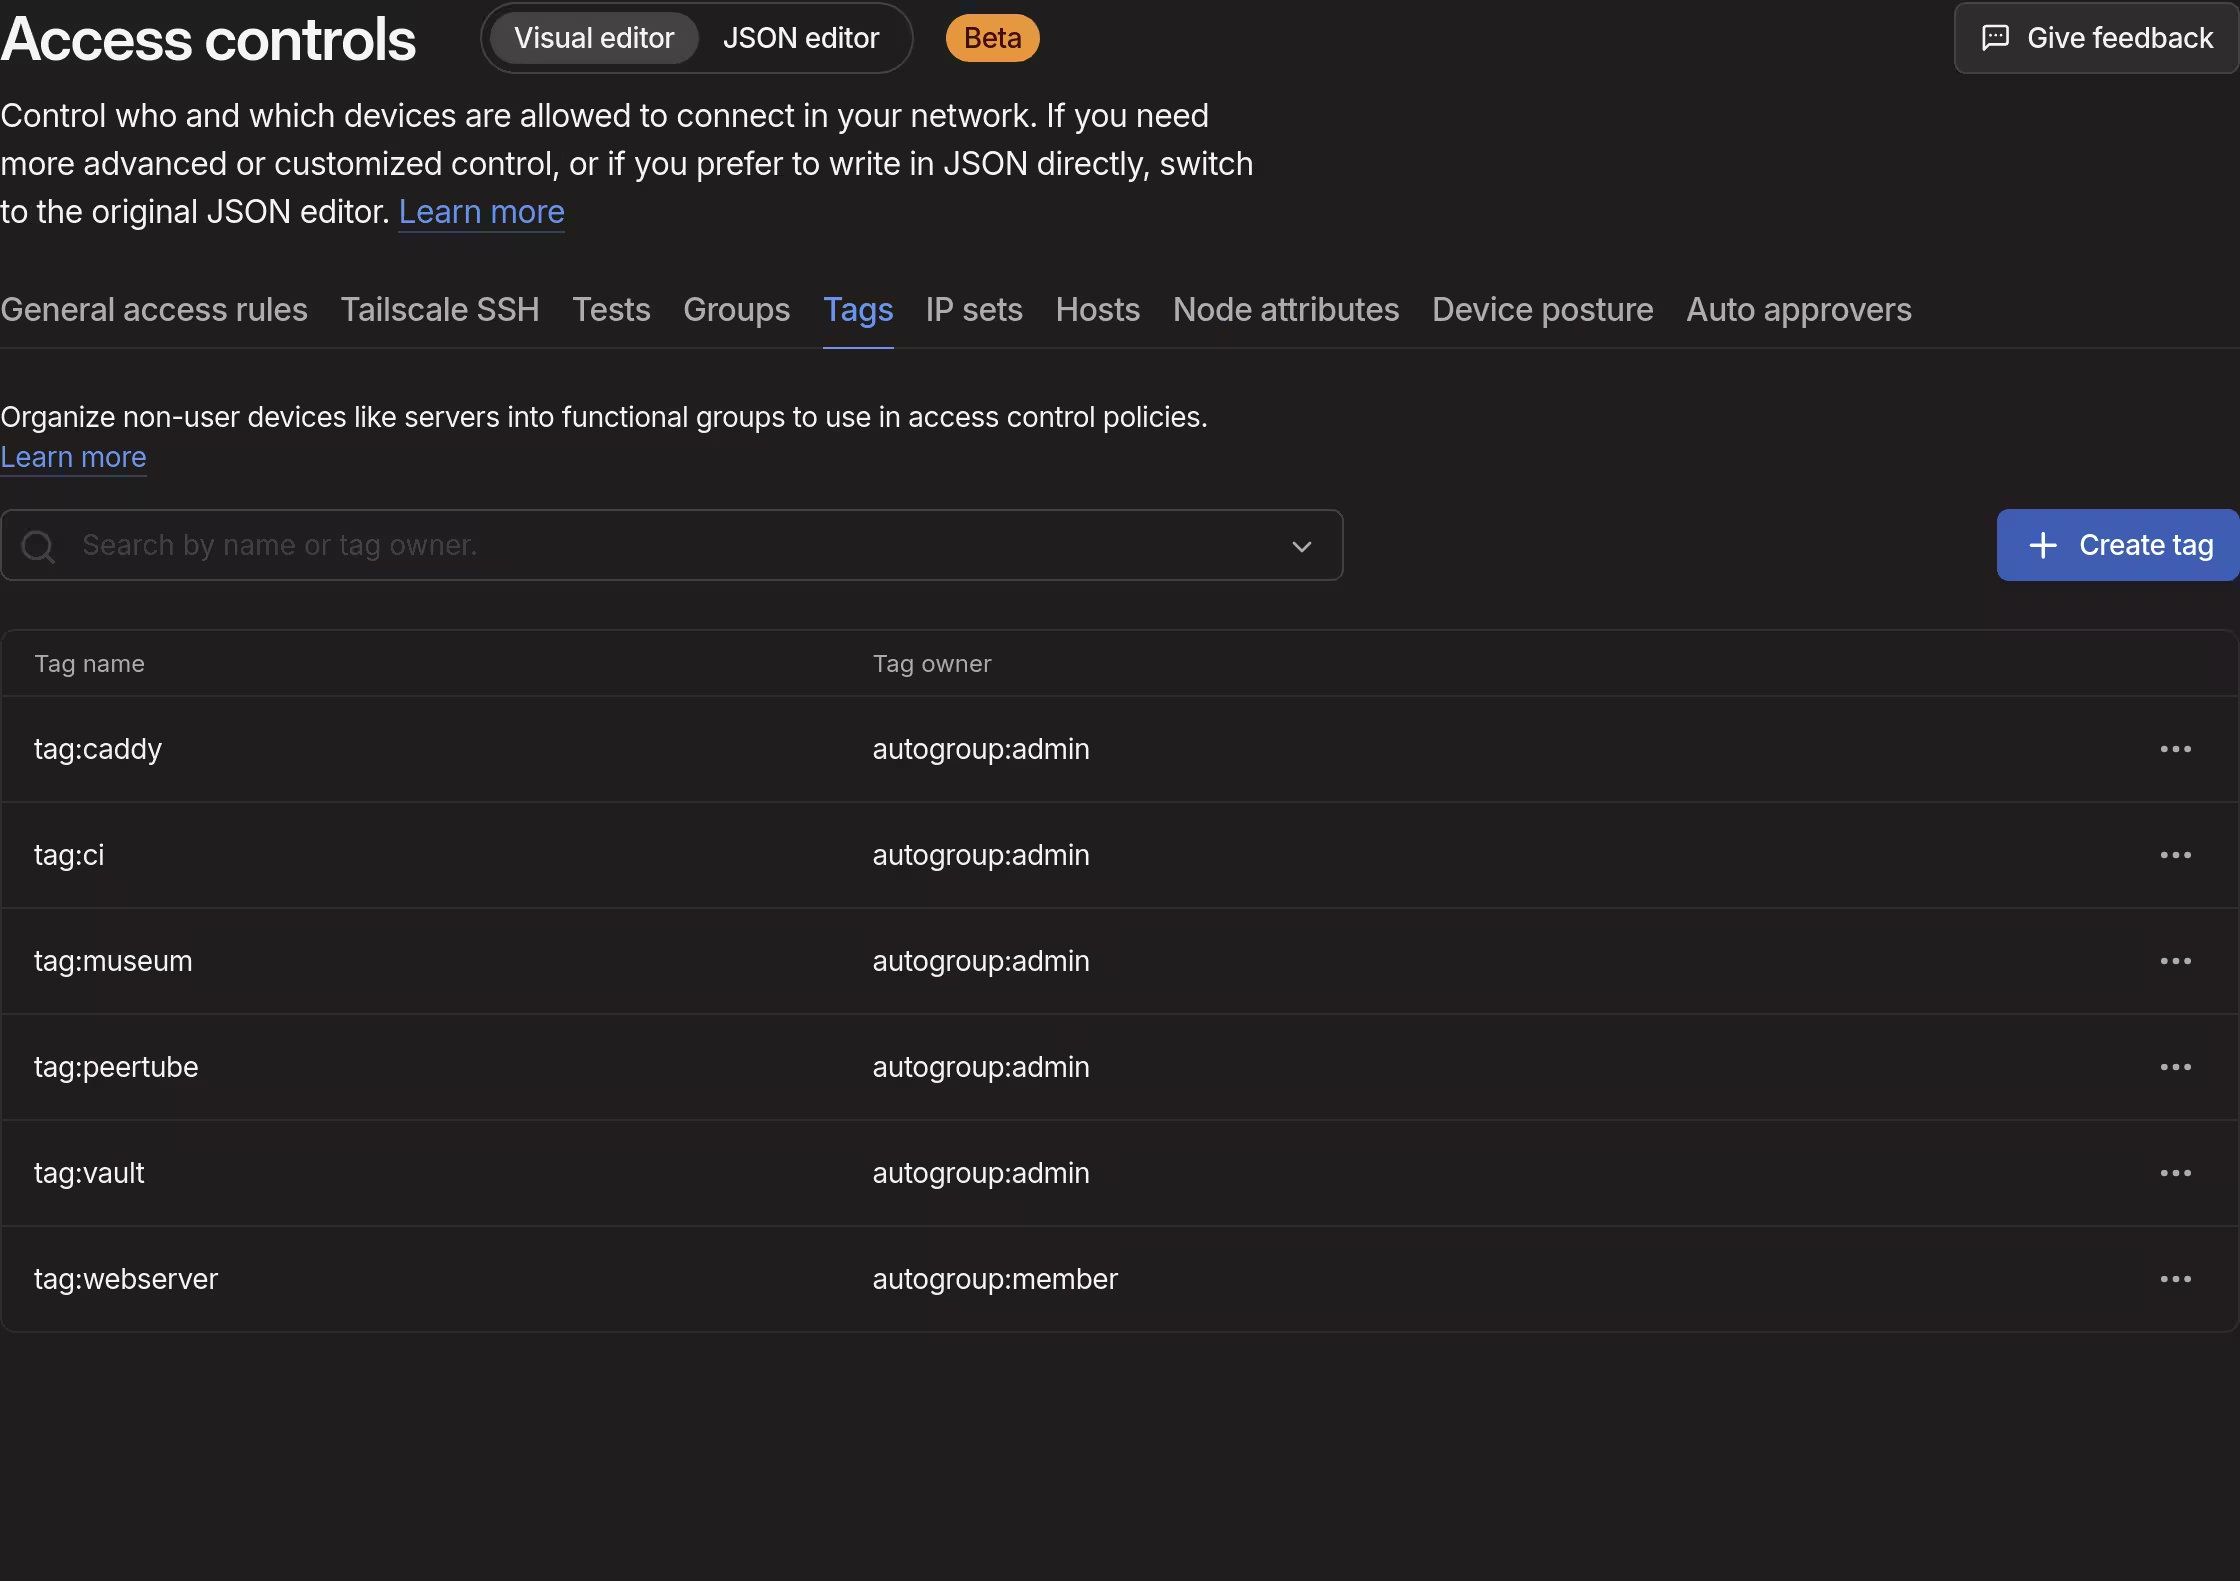
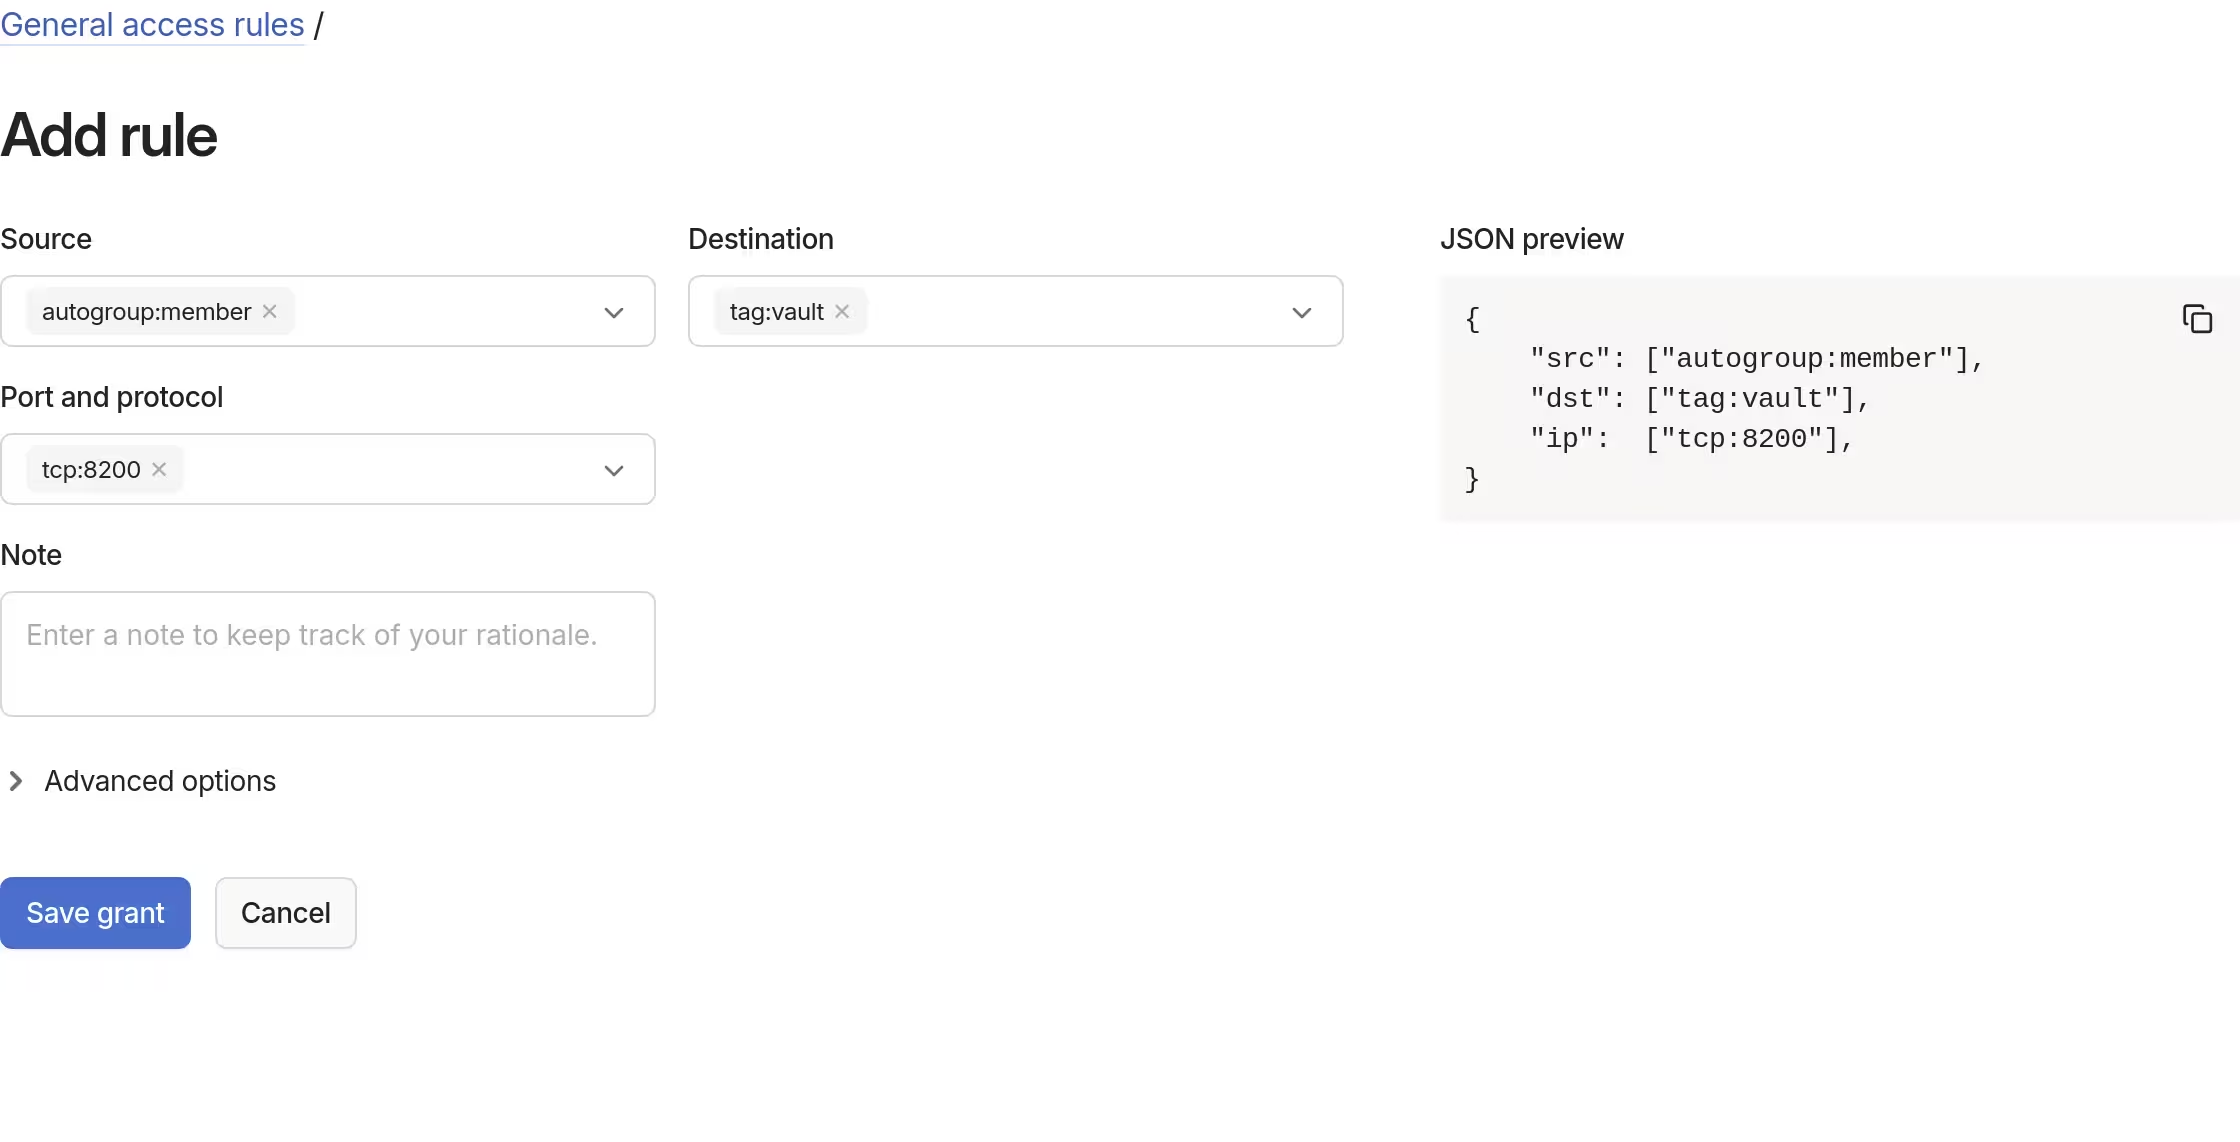
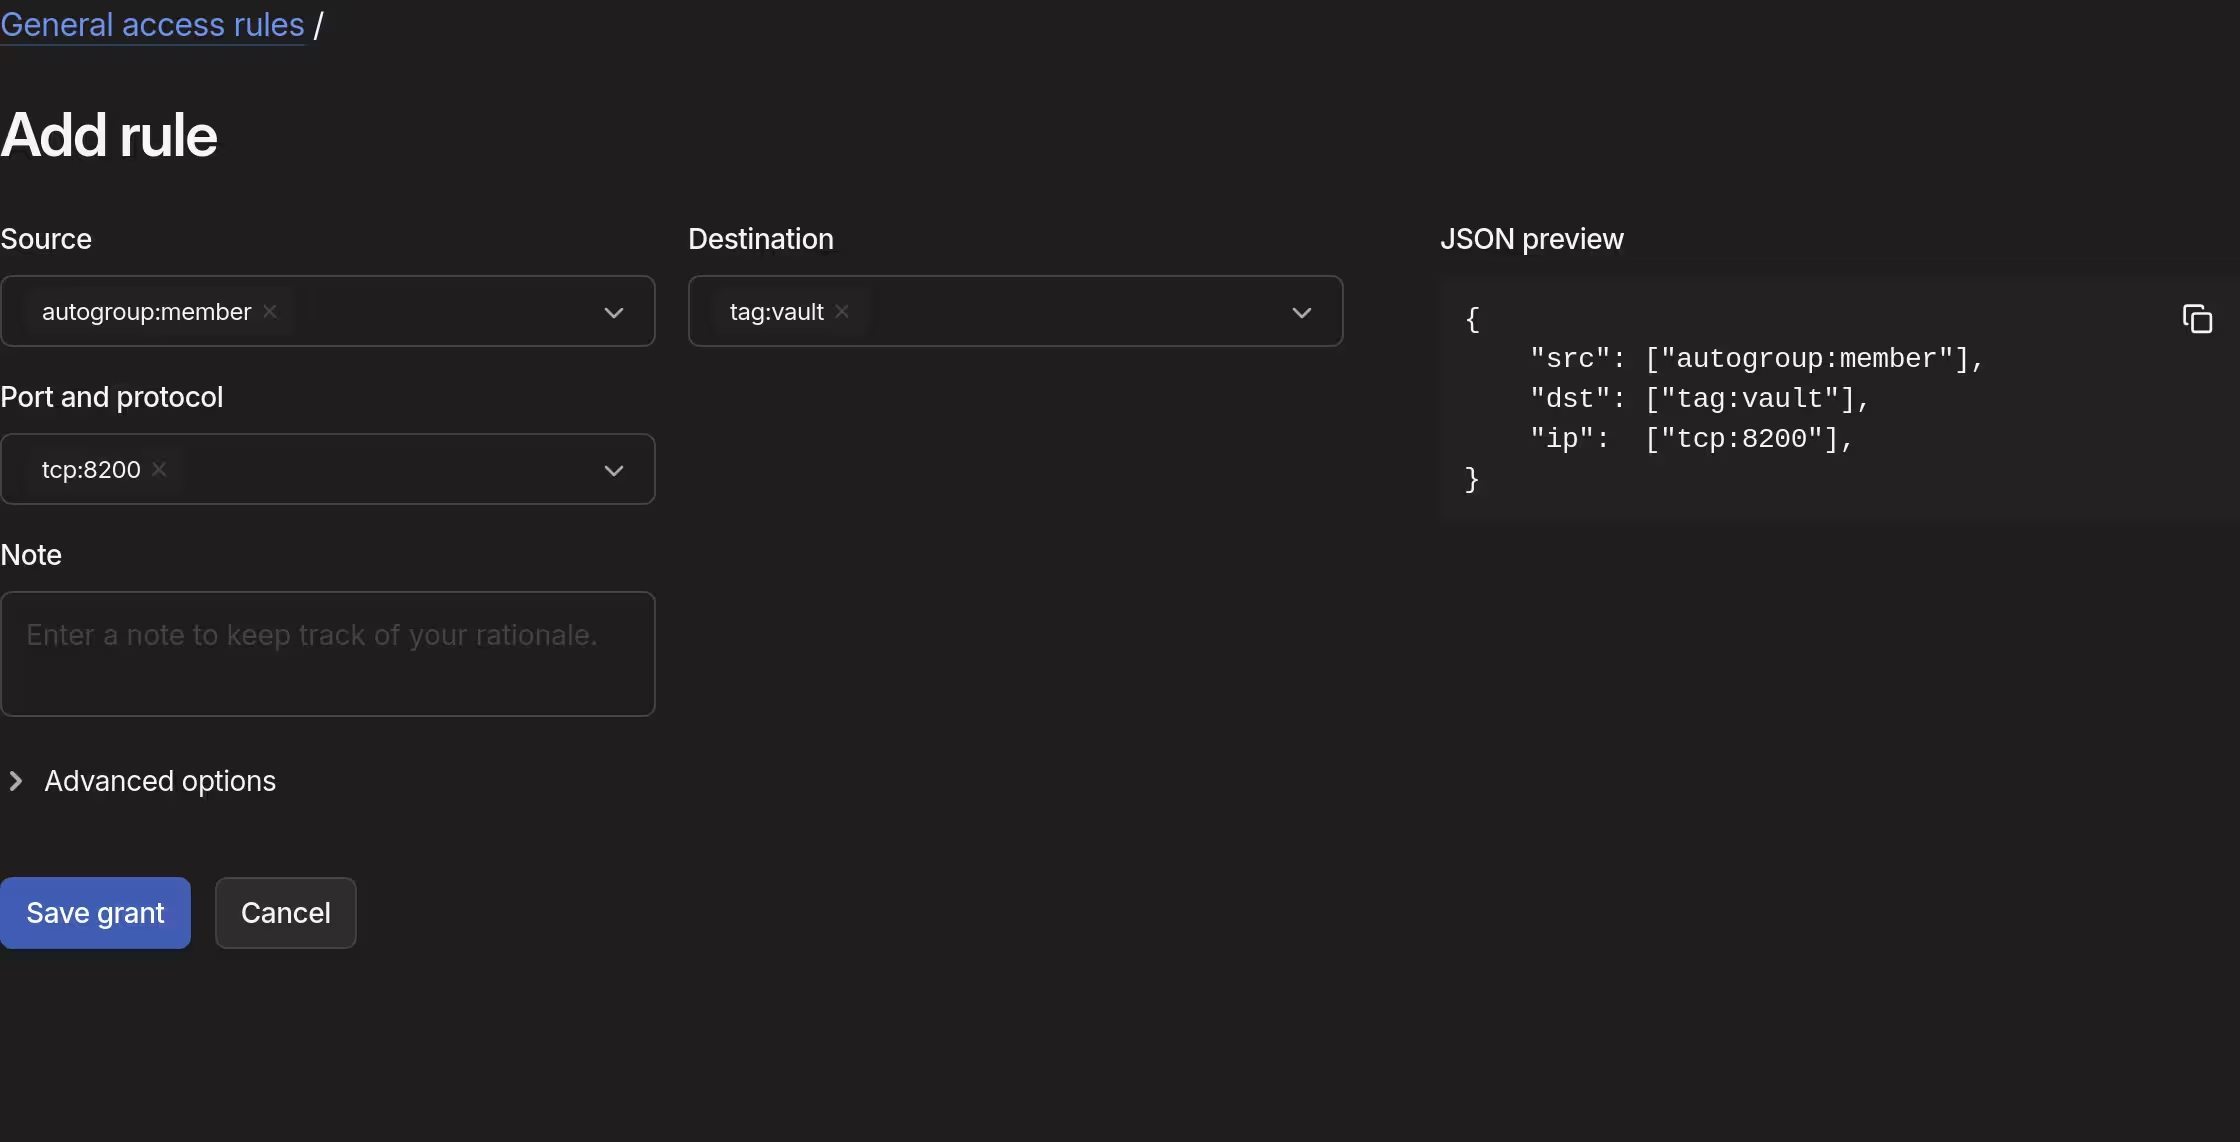
With the tags in place, an access rule was added to allow members of the tailnet to access Vault
Creation of an OAuth client followed. The tags vault and webserver were assigned for the auth_keys scope.
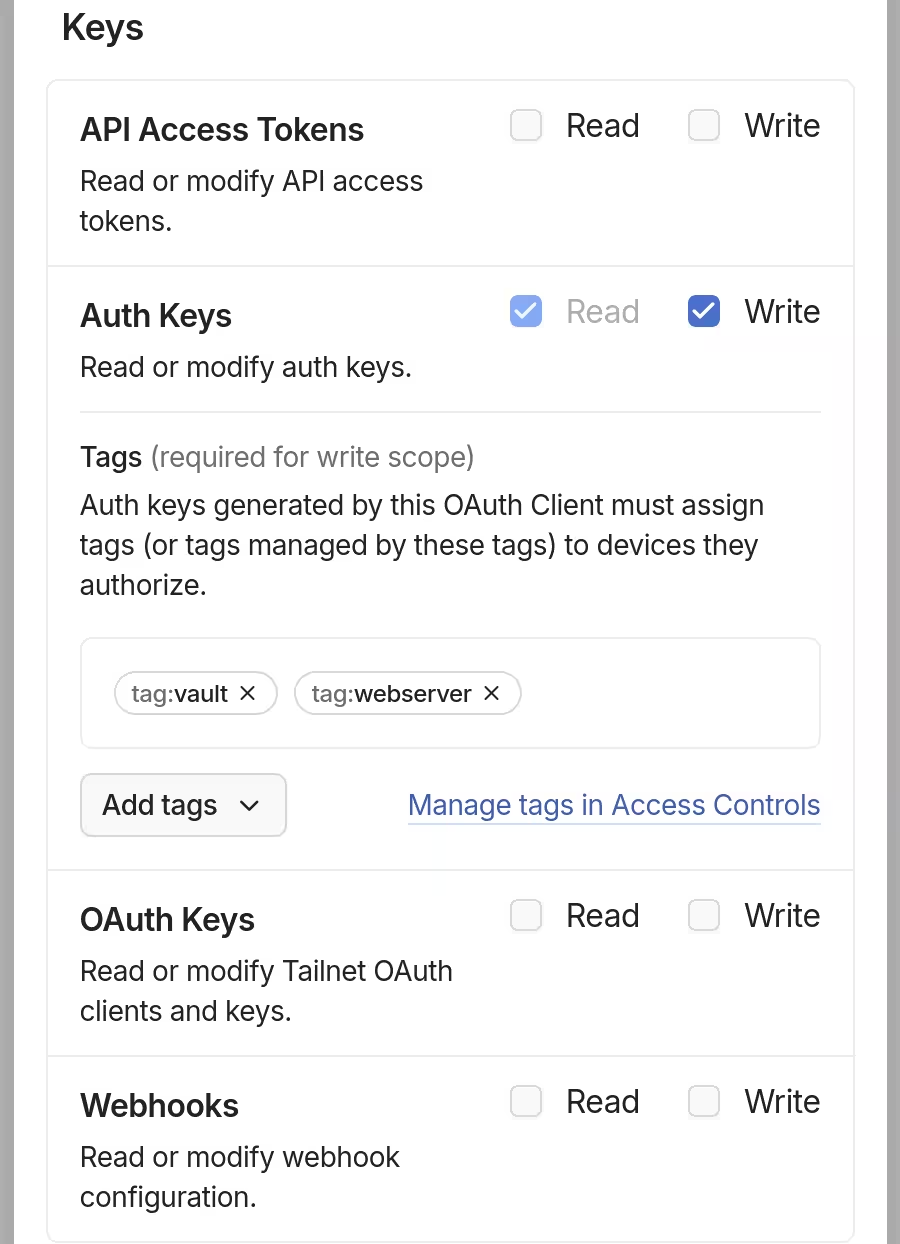
The created secret was added to secrets.yaml. The key value was set to tailscale-auth-key, so that I can refer to it as sops.secrets.tailscale-auth-key upon writing NixOS configurations.
[lyuk98@framework:~/nixos-config]$ sops edit hosts/vault/secrets.yaml
# Existing secret...
tailscale-auth-key: tskey-client-<ID>-<secret>
Vault-specific Tailscale configuration was written afterwards.
{ config, ... }:
{
  # Get auth key via sops-nix
  sops.secrets.tailscale-auth-key = {
    sopsFile = ./secrets.yaml;
  };

  # Apply host-specific Tailscale configurations
  services.tailscale = {
    # Provide auth key to issue `tailscale up` with
    authKeyFile = config.sops.secrets.tailscale-auth-key.path;

    # Enable Tailscale SSH and advertise tags
    extraUpFlags = [
      "--advertise-tags=tag:webserver,tag:vault"
      "--hostname=vault"
      "--ssh"
    ];

    # Use routing features for servers
    useRoutingFeatures = "server";
  };
}
Creating a custom image
There were some ways to turn my NixOS configuration into an image that DigitalOcean accepts:
- Using a DigitalOcean NixOS module and building with
nix build .#nixosConfigurations.vault.config.system.build.digitalOceanImage - Including nixos-generators and running
nix build .#nixosConfigurations.vault.config.formats.raw-efi
However, I faced a major problem: they attempted to create an image with their own partition layout and / was assumed to be an ext4 file system. The assumption conflicted with my existing configuration, that used Btrfs and root-on-tmpfs setup, and was unsuitable for my use case.
Fortunately, disko provided a way to generate a .raw image with my own partition layout.
First, the script to generate the image was built.
[lyuk98@framework:~/nixos-config]$ nix build .#nixosConfigurations.vault.config.system.build.diskoImagesScript
I ran the resultant script afterwards. The age key generated for the instance was also copied over with the flag --post-format-files. The process involved booting into a virtual machine and installing NixOS to the image.
[lyuk98@framework:~/nixos-config]$ ./result --post-format-files ~/keys.txt persist/var/lib/sops-nix/keys.txt
The script ran successfully after a minute or so. I then compressed the image to reduce the size of what will be uploaded to DigitalOcean.
[lyuk98@framework:~/nixos-config]$ bzip2 -9 main.raw
Creating a Droplet with the image
I first uploaded the custom image at the Control Panel.
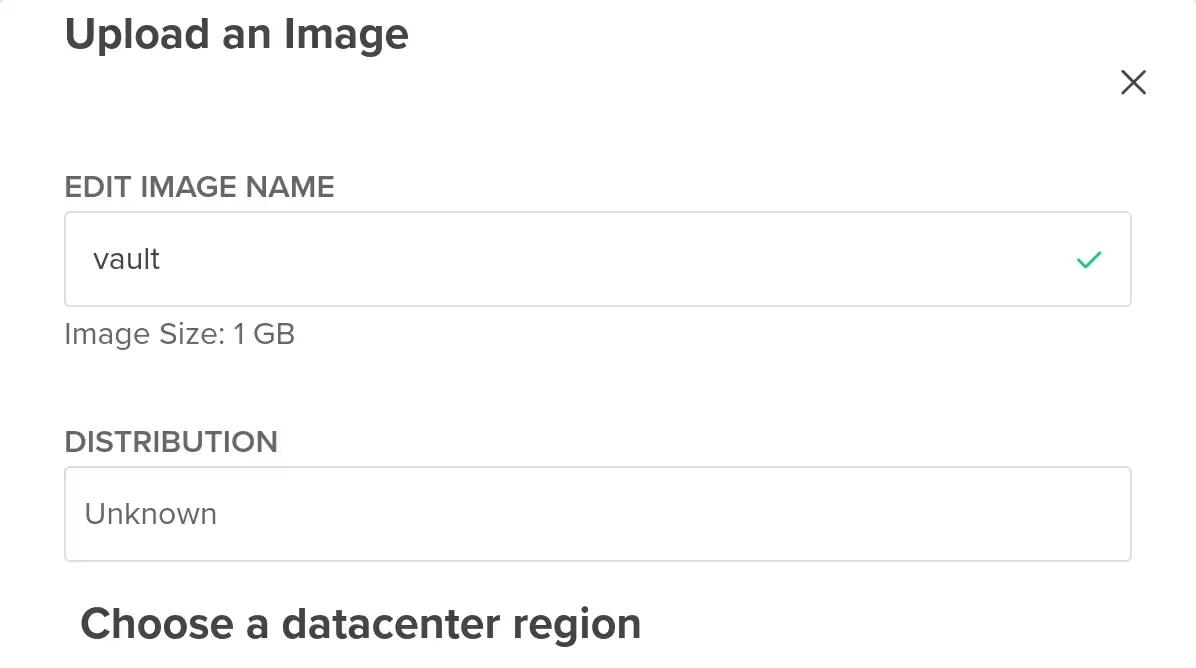
When it was done, I created a droplet with the image.
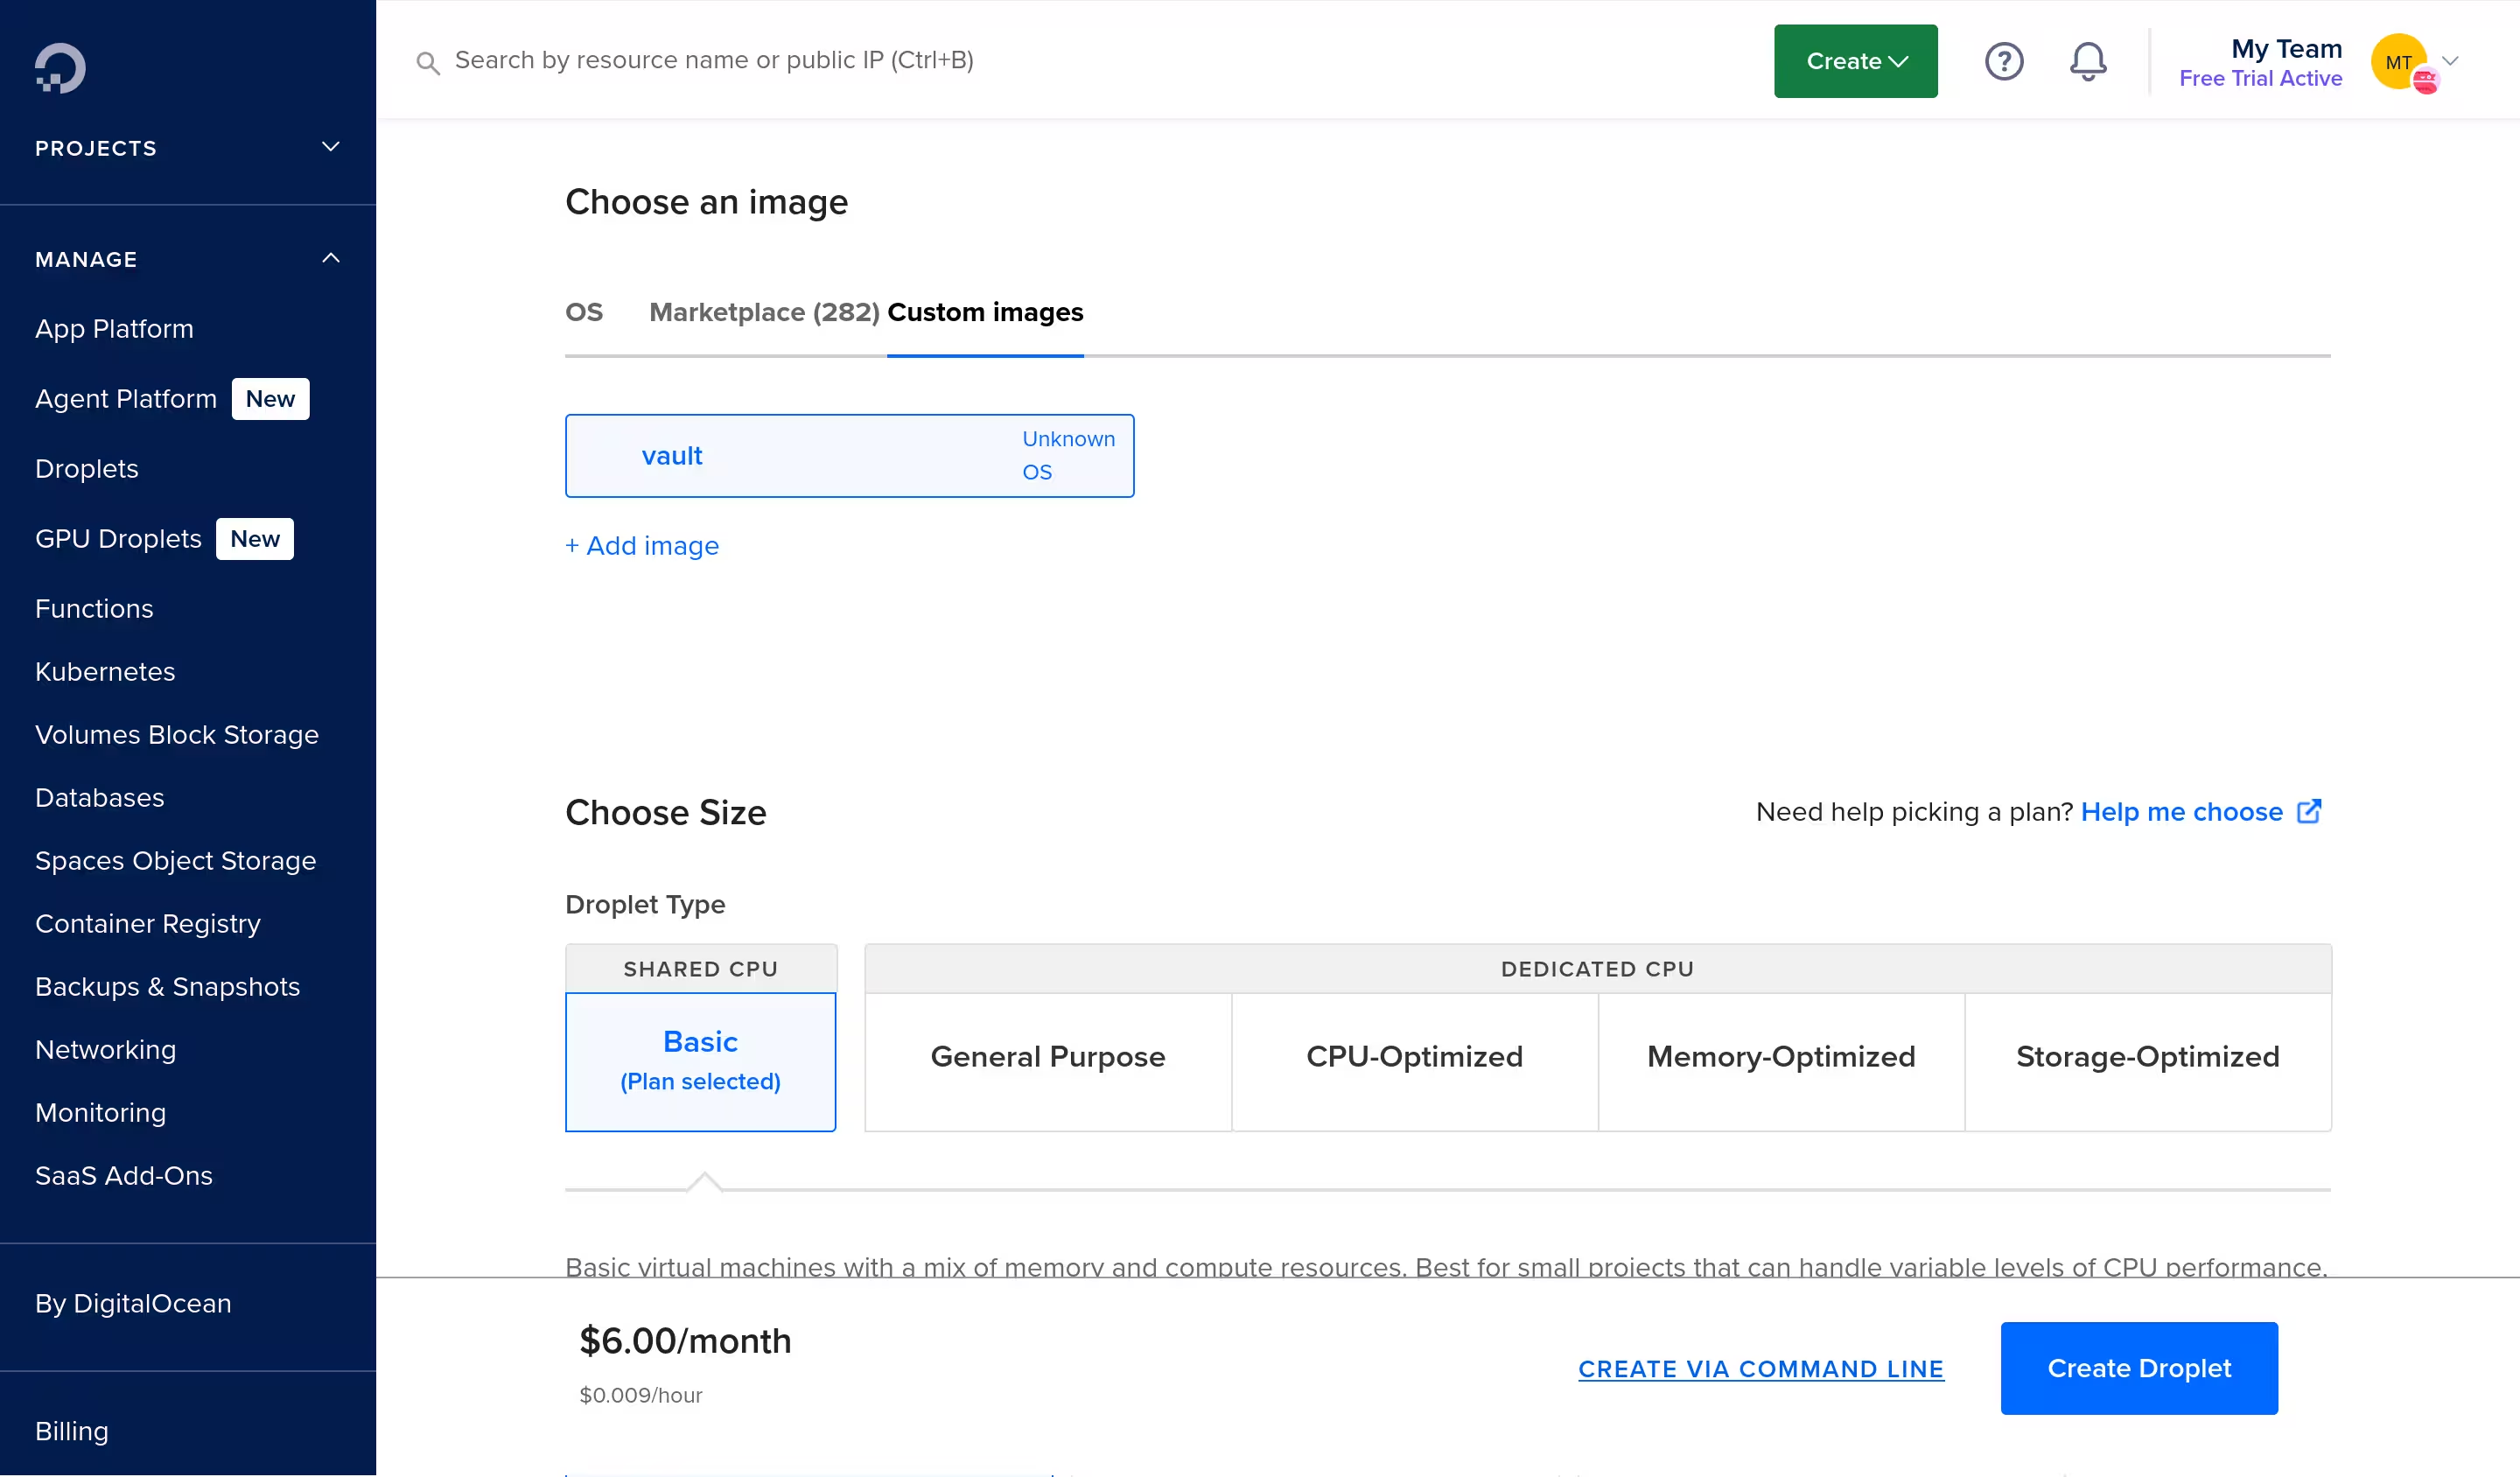
The instance was running, but it did not utilise more than how much it was allocated during image generation. There were some ways to grow a root partition, but given my unusual setup (where / is tmpfs), I did not feel they will work. In the end, I used growpart to imperatively resize the partition.
[root@vault:~]# nix shell nixpkgs#cloud-utils
[root@vault:~]# growpart /dev/vda 3
[root@vault:~]# btrfs filesystem resize max /nix
With the system ready, I moved onto the Vault service.
Running Vault
The first thing I did was to decide how to store data. With impermanence set up on NixOS, I either had to persist the storage path or use a different backend. I have already been using Backblaze B2, so I opted to use the S3 storage backend. The drawback was the lack of high availability, but with just a single service using Vault, I did not think it mattered that much.
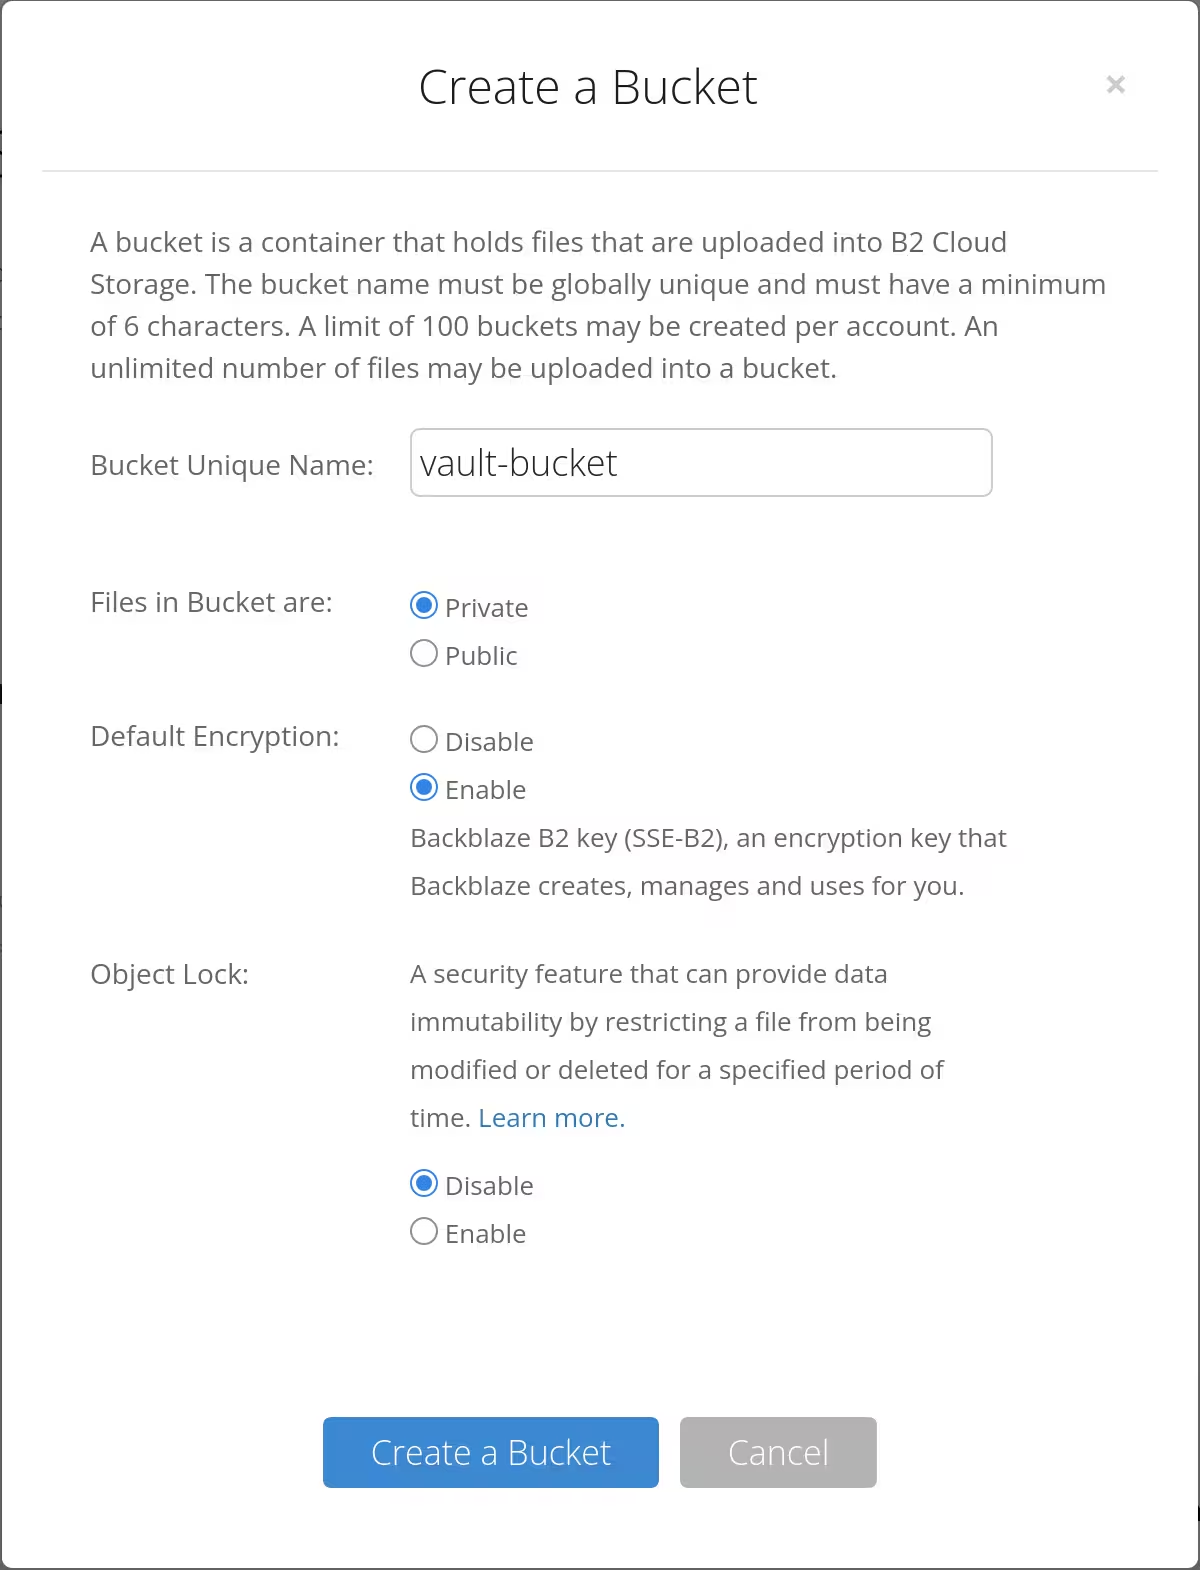
I went my Backblaze account and created a bucket (which name is not actually vault-bucket).
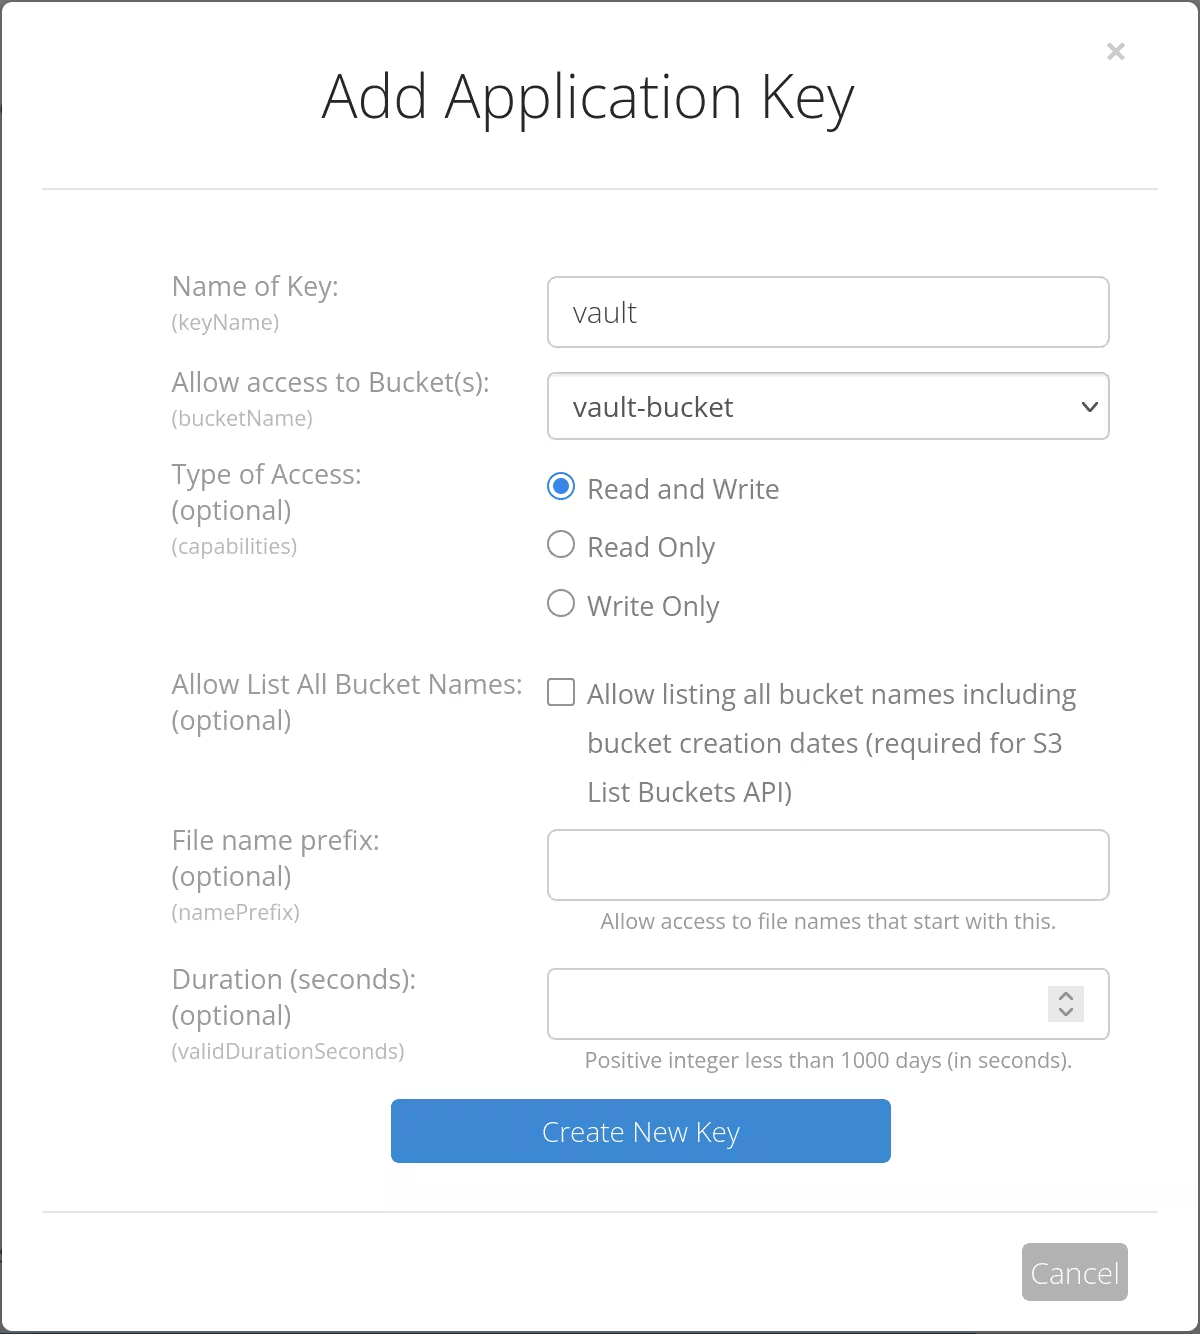
An application key to access the bucket was also created afterwards.
At where my NixOS configuration for Vault is, I created vault.hcl containing sensitive information. It was to be encrypted and passed on to the option services.vault.extraSettingsPaths.
api_addr = "http://<API address>:8200"

storage "s3" {
  bucket              = "vault-bucket"
  endpoint            = "https://s3.<region>.backblazeb2.com"
  region              = "<region>"
  access_key          = "<application key ID>"
  secret_key          = "<application key>"
  s3_force_path_style = "true"
}
To allow vault.hcl to be encrypted, I added a creation rule at .sops.yaml.
creation_rules:
  # Secrets specific to host "vault"
  - path_regex: hosts/vault/secrets.ya?ml$
    key_groups:
    - age:
      - *vault
  - path_regex: hosts/vault/vault.hcl
    key_groups:
    - age:
      - *vault
The settings file could then be encrypted in place.
[lyuk98@framework:~/nixos-config]$ sops encrypt --in-place hosts/vault/vault.hcl
When the secret was ready, I wrote vault.nix containing Vault-related configuration.
{
  pkgs,
  lib,
  config,
  ...
}:
{
  sops.secrets = {
    # Get secret Vault settings
    vault-settings = {
      format = "binary";

      # Change ownership of the secret to user `vault`
      owner = config.users.users.vault.name;
      group = config.users.groups.vault.name;

      sopsFile = ./vault.hcl;
    };
  };

  # Allow unfree package for Vault
  nixpkgs.config.allowUnfreePredicate =
    pkg:
    builtins.elem (lib.getName pkg) [
      "vault"
      "vault-bin"
    ];

  services.vault = {
    # Enable Vault daemon
    enable = true;

    # Use binary version of Vault from Nixpkgs
    package = pkgs.vault-bin;

    # Listen to all available interfaces
    address = "[::]:8200";

    # Use S3 as a storage backend
    storageBackend = "s3";

    # Add secret Vault settings
    extraSettingsPaths = [
      config.sops.secrets.vault-settings.path
    ];

    # Enable Vault UI
    extraConfig = ''
      ui = true
    '';
  };
}
The new configuration was applied. I could not successfully issue nixos-rebuild switch as it apparently conflicted with what Cloud-init performed after boot, so I rebooted the instance after running nixos-rebuild boot.
[lyuk98@framework:~/nixos-config]$ nixos-rebuild boot --target-host root@vault --flake .#vault
[lyuk98@framework:~/nixos-config]$ ssh root@vault reboot
After making sure vault.service was running, I initialised Vault by running vault operator init. Five unsealing keys were generated as a result.
[root@vault:~]# NIXPKGS_ALLOW_UNFREE=1 nix shell --impure nixpkgs#vault-bin
[root@vault:~]# vault operator init -address http://127.0.0.1:8200
I checked the status of the Vault from my device afterwards to verify that I can access the Vault via tailnet.
[lyuk98@framework:~]$ vault status -address "http://<API address>:8200"
Key                Value
---                -----
Seal Type          shamir
Initialized        true
Sealed             true
Total Shares       5
Threshold          3
Unseal Progress    0/3
Unseal Nonce       n/a
Version            1.19.4
Build Date         2025-05-14T13:04:47Z
Storage Type       s3
HA Enabled         false
Post-installation configuration
First, I set the VAULT_ADDR environment variable so that I no longer have to supply -address parameter.
[lyuk98@framework:~]$ export VAULT_ADDR="http://<API address>:8200"
Before doing anything with the Vault, it had to be unsealed. Doing so required entering at least three of the five unsealing keys. I ran vault operator unseal three times, entering a different key each time.
[lyuk98@framework:~]$ vault operator unseal
[lyuk98@framework:~]$ vault operator unseal
[lyuk98@framework:~]$ vault operator unseal
With the root token initially provided during vault operator init, I logged into the Vault by running vault login.
[lyuk98@framework:~]$ vault login
Bootstrapping (the imperative part)
The Vault was ready, and I started preparing for granting Terraform access to various cloud providers.
However, I started wondering: how should the access credentials themselves (that are used for Terraform) be generated? I felt most of them have to be created imperatively, but I wanted to create a separate Terraform configuration for what I could declaratively manage.
Enabling Vault's capabilities
I anticipated several key/value secrets to be stored on Vault. To prepare for them, KV secrets engine was enabled.
[lyuk98@framework:~]$ vault secrets enable kv
Success! Enabled the kv secrets engine at: kv/
For Ente's Museum to use Vault, I thought using AppRole authentication made sense. It was therefore also enabled.
[lyuk98@framework:~]$ vault auth enable approle
Success! Enabled approle auth method at: approle/
Enabling access to Backblaze B2
I had to consider how to store the Terraform state, and since I already use Backblaze B2, I decided to use the s3 backend. The goal was to create a bucket (to store state files) and two application keys: one for accessing state and another for creating application keys.
I started by providing my master application key to the Backblaze B2 command-line tool.
[lyuk98@framework:~]$ nix shell nixpkgs#backblaze-b2
[lyuk98@framework:~]$ backblaze-b2 account authorize
A bucket (which name is not actually terraform-state-ente) to store state files was created next.
[lyuk98@framework:~]$ backblaze-b2 bucket create \
  terraform-state-ente \
  allPrivate \
  --default-server-side-encryption SSE-B2
As a way to access state files, an application key, which access is restricted to the specified bucket, was created.
[lyuk98@framework:~]$ backblaze-b2 key create \
  --bucket terraform-state-ente \
  --name-prefix terraform-ente-bootstrap \
  terraform-state-ente-bootstrap \
  deleteFiles,listBuckets,listFiles,readFiles,writeFiles
A separate application key, for Terraform to create an application key, was also created.
[lyuk98@framework:~]$ backblaze-b2 key create \
  terraform-ente-bootstrap \
  deleteKeys,listBuckets,listKeys,writeKeys
The capabilities for the two application keys are results of trial and error; I was not able to find proper documentation describing what are necessary.
I wrote a file bootstrap.json, containing two application keys, to prepare the data that will be sent over.
{
  "b2_application_key": "<application key>",
  "b2_application_key_id": "<application key ID>",
  "b2_state_application_key": "<application key for writing Terraform state>",
  "b2_state_application_key_id": "<application key ID for writing Terraform state>"
}
The data was then saved into Vault.
[lyuk98@framework:~]$ edit bootstrap.json
[lyuk98@framework:~]$ vault kv put -mount=kv ente/bootstrap @bootstrap.json
Success! Data written to: kv/ente/bootstrap
I did not want some details to be visible (that some may find acceptable). As a result, I wrote them into a file, which was also sent to Vault.
{
  "b2_bucket": "terraform-state-ente",
  "b2_endpoint": "https://s3.<region>.backblazeb2.com"
}
[lyuk98@framework:~]$ edit backend.json
[lyuk98@framework:~]$ vault kv put -mount=kv ente/b2/tfstate-bootstrap @backend.json
Success! Data written to: kv/ente/b2/tfstate-b2-ente
Configuring OpenID Connect for GitHub Actions
GitHub Actions was my choice of tool for deploying Terraform configurations. To access Amazon Web Services, I could, just like what many people I found online did, use access keys. However, I was recommended every step of the way to look for alternative methods instead of creating long-term credentials.
As a best practice, use temporary security credentials (such as IAM roles) instead of creating long-term credentials like access keys. Before creating access keys, review the alternatives to long-term access keys.
To eliminate the need of static credentials, I opted to use OpenID Connect (OIDC). With the guide provided by GitHub, I took steps to grant GitHub Actions workflows access to AWS.
I used AWS CLI to perform tasks, and to do so, I ran aws sso login. Prior to logging in, setting up IAM Identity Center was needed.
[lyuk98@framework:~]$ nix shell nixpkgs#awscli2
[lyuk98@framework:~]$ aws sso login
After logging myself in, GitHub was added as an OIDC provider.
[lyuk98@framework:~]$ aws iam create-open-id-connect-provider \
  --url https://token.actions.githubusercontent.com \
  --client-id-list sts.amazonaws.com
A role that GitHub Actions workflows will assume was to be created. In order to prevent anything else from assuming the role, a trust policy document based on the guide was created, allowing access to workflows running for my repository.
{
  "Version": "2012-10-17",
  "Statement": [
    {
      "Effect": "Allow",
      "Action": "sts:AssumeRoleWithWebIdentity",
      "Principal": {
        "Federated": "arn:aws:iam::<account ID>:oidc-provider/token.actions.githubusercontent.com"
      },
      "Condition": {
        "StringEquals": {
          "token.actions.githubusercontent.com:aud": "sts.amazonaws.com",
          "token.actions.githubusercontent.com:sub": "repo:lyuk98/terraform-ente-bootstrap:ref:refs/heads/main"
        }
      }
    }
  ]
}
The trust policy was written to file and was referenced upon the creation of the role.
[lyuk98@framework:~]$ edit terraform-ente-bootstrap-trust-policy.json
[lyuk98@framework:~]$ aws iam create-role \
  --role-name terraform-ente-bootstrap \
  --assume-role-policy-document file://terraform-ente-bootstrap-trust-policy.json
I initially wanted to let Vault's AWS secrets engine provide access credentials for the separate role that can perform actual provisioning, but implementing it felt a bit too complex to me at the time I was working on it. As a result, a policy for that purpose was created directly for the role that the workflow will assume.
{
  "Version": "2012-10-17",
  "Statement": [
    {
      "Effect": "Allow",
      "Action": [
        "iam:GetRole",
        "iam:UpdateAssumeRolePolicy",
        "iam:ListInstanceProfilesForRole",
        "iam:DeleteRolePolicy",
        "iam:ListAttachedRolePolicies",
        "iam:CreateRole",
        "iam:DeleteRole",
        "iam:UpdateRole",
        "iam:PutRolePolicy",
        "iam:ListRolePolicies",
        "iam:GetRolePolicy"
      ],
      "Resource": [
        "arn:aws:iam::<account ID>:role/terraform-ente"
      ]
    },
    {
      "Effect": "Allow",
      "Action": "iam:GetOpenIDConnectProvider",
      "Resource": "arn:aws:iam::<account ID>:oidc-provider/token.actions.githubusercontent.com"
    },
    {
      "Effect": "Allow",
      "Action": "iam:ListOpenIDConnectProviders",
      "Resource": "arn:aws:iam::<account ID>:oidc-provider/*"
    }
  ]
}
The role was then created which, with the policy attached, can create new roles and policies.
[lyuk98@framework:~]$ edit terraform-ente-bootstrap-policy.json
[lyuk98@framework:~]$ aws iam create-policy \
  --policy-name terraform-ente-bootstrap \
  --policy-document file://terraform-ente-bootstrap-policy.json
[lyuk98@framework:~]$ aws iam attach-role-policy \
  --role-name terraform-ente-bootstrap \
  --policy-arn arn:aws:iam::<account ID>:policy/terraform-ente-bootstrap
Setting up Vault's AWS authentication method
I have noticed that one of several ways Vault can grant access to clients is by checking if they have right IAM credentials from AWS. Since GitHub Actions will have access to the cloud provider, I did not have to manage separate credentials for Vault.
For Vault to use the AWS API, and eventually for me to use the authentication method, I had to provide IAM credentials. Using access keys was not favourable, but since the other option, using plugin Workload Identity Federation (WIF), was only available with Vault Enterprise, I went with the former option.
Before creating a user, an IAM group was created.
[lyuk98@framework:~]$ aws iam create-group --group-name vault-iam-group
An example showed the recommended IAM policy for Vault, so I took it and modified it a bit. In particular, the sts:AssumeRole stanza was removed since cross account access was not needed in my case.
{
  "Version": "2012-10-17",
  "Statement": [
    {
      "Effect": "Allow",
      "Action": [
        "ec2:DescribeInstances",
        "iam:GetInstanceProfile",
        "iam:GetUser",
        "iam:GetRole"
      ],
      "Resource": "*"
    },
    {
      "Sid": "ManageOwnAccessKeys",
      "Effect": "Allow",
      "Action": [
        "iam:CreateAccessKey",
        "iam:DeleteAccessKey",
        "iam:GetAccessKeyLastUsed",
        "iam:GetUser",
        "iam:ListAccessKeys",
        "iam:UpdateAccessKey"
      ],
      "Resource": "arn:aws:iam::*:user/${aws:username}"
    }
  ]
}
The policy document was created and attached to the new IAM group.
[lyuk98@framework:~]$ edit vault-auth-iam-policy.json
[lyuk98@framework:~]$ aws iam create-policy \
  --policy-name vault-auth-iam-policy \
  --policy-document file://vault-auth-iam-policy.json
[lyuk98@framework:~]$ aws iam attach-group-policy \
  --group-name vault-iam-group \
  --policy-arn arn:aws:iam::<account ID>:policy/vault-auth-iam-policy
A new IAM user was then created and added to the IAM group.
[lyuk98@framework:~]$ aws iam create-user --user-name vault-iam-user
[lyuk98@framework:~]$ aws iam add-user-to-group \
  --group-name vault-iam-group \
  --user-name vault-iam-user
With the user present, an access key was created.
[lyuk98@framework:~]$ aws iam create-access-key --user-name vault-iam-user
Vault's AWS authentication method was subsequently enabled and the access key was provided to it.
[lyuk98@framework:~]$ vault auth enable aws
Success! Enabled aws auth method at: aws/
[lyuk98@framework:~]$ vault write auth/aws/config/client \
  access_key=<AWS access key ID> \
  secret_key=<AWS secret access key>
Success! Data written to: auth/aws/config/client
Creating a policy and a role for AWS authentication
I have written enough policies already, but there had to be another. This time, it was for Vault: I had to limit access to just the necessary resources that Terraform needs. Specifically, clients could only read some secrets, write some for actual provisioning, and create new policies.
# Permission to create child tokens
path "auth/token/create" {
  capabilities = ["create", "update"]
}

# Permission to access mounts
path "sys/mounts/auth/aws" {
  capabilities = ["read"]
}

path "sys/mounts/auth/token" {
  capabilities = ["read"]
}

# Permission to read keys for bootstrapping
path "kv/ente/bootstrap" {
  capabilities = ["read"]
}

path "kv/ente/b2/tfstate-bootstrap" {
  capabilities = ["read"]
}

# Permission to read and modify other B2 application keys for bootstrapping
path "kv/ente/b2/tfstate-ente" {
  capabilities = ["create", "read", "update", "delete"]
}

# Permission to read and modify application keys for cloud providers
path "kv/ente/b2/terraform-b2-ente" {
  capabilities = ["create", "read", "update", "delete"]
}

# Permission to read and modify AWS roles
path "auth/aws/role/terraform-ente" {
  capabilities = ["create", "read", "update", "delete"]
}

# Permission to read and modify policies
path "sys/policies/acl/terraform-vault-auth-token-ente" {
  capabilities = ["create", "read", "update", "delete"]
}

path "sys/policies/acl/terraform-state-ente" {
  capabilities = ["create", "read", "update", "delete"]
}

path "sys/policies/acl/terraform-vault-acl-ente" {
  capabilities = ["create", "read", "update", "delete"]
}

path "sys/policies/acl/terraform-aws-museum" {
  capabilities = ["create", "read", "update", "delete"]
}

path "sys/policies/acl/terraform-b2-ente" {
  capabilities = ["create", "read", "update", "delete"]
}
The policy was saved into Vault.
[lyuk98@framework:~]$ edit terraform-ente-bootstrap.hcl && vault policy fmt terraform-ente-bootstrap.hcl
Success! Formatted policy: terraform-ente-bootstrap.hcl
[lyuk98@framework:~]$ vault policy write terraform-ente-bootstrap terraform-ente-bootstrap.hcl
Success! Uploaded policy: terraform-ente-bootstrap
The creation of a role within the AWS auth method itself followed. Anyone successfully gaining access to Vault with this role was to be bound by the policy I just wrote above.
[lyuk98@framework:~]$ vault write auth/aws/role/terraform-ente-bootstrap \
  auth_type=iam \
  policies=terraform-ente-bootstrap \
  bound_iam_principal_arn=arn:aws:iam::<AWS account ID>:role/terraform-ente-bootstrap
Success! Data written to: auth/aws/role/terraform-ente-bootstrap
Bootstrapping (the declarative part)
I started writing down Terraform code at a GitHub repository I have created.
Preparing Terraform configurations
To keep track of what resources are active, the s3 backend was configured. Since alternative S3-compatible services are only supported on a "best effort" basis, using Backblaze B2 required skipping a few checks that were for Amazon S3.
terraform {
  backend "s3" {
    skip_credentials_validation = true
    skip_metadata_api_check     = true
    skip_region_validation      = true
    skip_requesting_account_id  = true
    region                      = "us-west-002"

    use_path_style = true
    key            = "terraform-ente-bootstrap.tfstate"
  }
}
Setting use_path_style was probably not necessary, but the region, even if it is not checked at all, still needed to be specified. Since multiple repositories are storing states, key was set as where the state file will be saved. Other parameters, such as bucket and access_key, were not set here; they were instead to be separately provided during the terraform init stage.
Specifications for the providers were next. I did not write any arguments for them; they were to be provided either as environment variables or files (like ~/.vault-token).
terraform {
  required_providers {
    aws = {
      source  = "hashicorp/aws"
      version = "~> 6.13"
    }
    b2 = {
      source  = "Backblaze/b2"
      version = "~> 0.10"
    }
    vault = {
      source  = "hashicorp/vault"
      version = "~> 5.3"
    }
  }
}

provider "aws" {}

provider "b2" {}

provider "vault" {}
To make configurations separate among cloud providers, I divided them into modules. In retrospect, this was perhaps not necessary, but this experience allowed me to realise just that.
module "aws" {
  source = "./modules/aws"
}

module "b2" {
  source         = "./modules/b2"
  # Input follows...
}

module "vault" {
  source = "./modules/vault"
  # Inputs follow...
}
Bootstrapping Amazon Web Services
The goal for this module was to create an IAM role that the provisioning Terraform workflow will assume. A policy to allow creation of Lightsail resources, as well as a trust policy to allow access only from specific GitHub Actions workflows, were defined.
# Policy for Terraform configuration (Museum)
resource "aws_iam_role_policy" "ente" {
  name = "terraform-ente"
  role = aws_iam_role.ente.id
  policy = jsonencode({
    Version = "2012-10-17"
    Statement = [
      {
        Effect = "Allow"
        Action = [
          "ec2:DescribeAvailabilityZones"
        ]
        Resource = "*"
      },
      {
        Effect = "Allow"
        Action = [
          "lightsail:AttachDisk",
          "lightsail:DeleteInstance",
          "lightsail:PutInstancePublicPorts",
          "lightsail:StartInstance",
          "lightsail:StopInstance",
          "lightsail:DeleteKeyPair",
          "lightsail:RebootInstance",
          "lightsail:OpenInstancePublicPorts",
          "lightsail:CloseInstancePublicPorts",
          "lightsail:DeleteDisk",
          "lightsail:DetachDisk",
          "lightsail:UpdateInstanceMetadataOptions"
        ]
        Resource = [
          "arn:aws:lightsail:*:${data.aws_caller_identity.current.account_id}:Disk/*",
          "arn:aws:lightsail:*:${data.aws_caller_identity.current.account_id}:KeyPair/*",
          "arn:aws:lightsail:*:${data.aws_caller_identity.current.account_id}:Instance/*"
        ]
      },
      {
        Effect = "Allow"
        Action = [
          "lightsail:CreateKeyPair",
          "lightsail:ImportKeyPair",
          "lightsail:GetInstancePortStates",
          "lightsail:GetInstances",
          "lightsail:GetKeyPair",
          "lightsail:GetDisks",
          "lightsail:CreateDisk",
          "lightsail:CreateInstances",
          "lightsail:GetInstance",
          "lightsail:GetDisk",
          "lightsail:GetKeyPairs"
        ]
        Resource = "*"
      }
    ]
  })
}

# Role to assume during deployment (Terraform)
resource "aws_iam_role" "ente" {
  name = "terraform-ente"
  assume_role_policy = jsonencode({
    Version = "2012-10-17"
    Statement = [
      {
        Effect = "Allow"
        Action = "sts:AssumeRoleWithWebIdentity"
        Principal = {
          Federated = "${data.aws_iam_openid_connect_provider.github.arn}"
        }
        Condition = {
          StringEquals = {
            "token.actions.githubusercontent.com:aud" = [
              "sts.amazonaws.com"
            ]
            "token.actions.githubusercontent.com:sub" = [
              "repo:lyuk98/terraform-ente:ref:refs/heads/main"
            ]
          }
        }
      }
    ]
  })
}
Some data sources, aws_caller_identity and aws_iam_openid_connect_provider, were used to substitute the account ID and ARNs.
The IAM role's ARN was declared as an output for the module, which was to be taken by Vault.
output "aws_role_arn" {
  value       = aws_iam_role.ente.arn
  description = "ARN of the IAM role for Terraform"
  sensitive   = true
}
Bootstrapping Backblaze B2
With this module, two application keys were defined: one for creating buckets and another for accessing Terraform state file.
locals {
  # Capabilities of application keys for accessing Terraform state files
  state_key_capabilities = [
    "deleteFiles",
    "listBuckets",
    "listFiles",
    "readFiles",
    "writeFiles"
  ]
}

# Key for creating buckets (Backblaze B2)
resource "b2_application_key" "terraform_b2_ente" {
  capabilities = [
    "deleteBuckets",
    "deleteKeys",
    "listBuckets",
    "listKeys",
    "readBucketEncryption",
    "writeBucketEncryption",
    "writeBucketRetentions",
    "writeBuckets",
    "writeKeys"
  ]
  key_name = "terraform-b2-ente"
}

# Get information about the bucket to store state
data "b2_bucket" "terraform_state" {
  bucket_name = var.tfstate_bucket
}

# Key for accessing Terraform state
resource "b2_application_key" "terraform_state_ente" {
  capabilities = local.state_key_capabilities
  key_name     = "terraform-state-ente"
  bucket_id    = data.b2_bucket.terraform_state.bucket_id
  name_prefix  = "terraform-ente"
}
Since it is not aware of which bucket (for Terraform state) to create an application key against, the name was declared as a variable, which another module (Vault) was going to provide.
variable "tfstate_bucket" {
  type        = string
  description = "Name of the bucket to store Terraform state"
  sensitive   = true
}
To let Vault save application keys, they were set as outputs.
output "application_key_b2" {
  value       = b2_application_key.terraform_b2_ente.application_key
  description = "Application Key for Backblaze B2"
  sensitive   = true
}

output "application_key_id_b2" {
  value       = b2_application_key.terraform_b2_ente.application_key_id
  description = "Application Key ID for Backblaze B2"
  sensitive   = true
}

output "application_key_tfstate_ente" {
  value       = b2_application_key.terraform_state_ente.application_key
  description = "Application Key for accessing Terraform state"
  sensitive   = true
}

output "application_key_id_tfstate_ente" {
  value       = b2_application_key.terraform_state_ente.application_key_id
  description = "Application Key ID for accessing Terraform state"
  sensitive   = true
}
Bootstrapping Vault
Vault had to write information that providers for AWS and Backblaze B2 produced, so they were first set as variables.
variable "b2_application_key" {
  type        = string
  description = "Application Key for Backblaze B2"
  sensitive   = true
}

variable "b2_application_key_id" {
  type        = string
  description = "Application Key ID for Backblaze B2"
  sensitive   = true
}

variable "b2_application_key_tfstate_ente" {
  type        = string
  description = "Application Key for accessing Terraform state"
  sensitive   = true
}

variable "b2_application_key_id_tfstate_ente" {
  type        = string
  description = "Application Key ID for accessing Terraform state"
  sensitive   = true
}

variable "aws_role_arn" {
  type        = string
  description = "ARN of the IAM role for Terraform"
  sensitive   = true
}
The bucket name that I have previously saved in Vault was retrieved and was set as an output, so that the object storage provider can create an application key with it.
# Read Vault for Terraform state storage information
data "vault_kv_secret" "terraform_state" {
  path = "kv/ente/b2/tfstate-bootstrap"
}

output "terraform_state" {
  value = {
    bucket   = data.vault_kv_secret.terraform_state.data.b2_bucket
    endpoint = data.vault_kv_secret.terraform_state.data.b2_endpoint
  }
  description = "Terraform state storage information"
  sensitive   = true
}
The application keys were then declared to be written to the secret storage.
# Application Key for Backblaze B2
resource "vault_kv_secret" "application_key_b2" {
  path = "kv/ente/b2/terraform-b2-ente"
  data_json = jsonencode({
    application_key    = var.b2_application_key,
    application_key_id = var.b2_application_key_id
  })
}

# Application Key for accessing Terraform state
resource "vault_kv_secret" "application_key_tfstate_ente" {
  path = "kv/ente/b2/tfstate-ente"
  data_json = jsonencode({
    application_key    = var.b2_application_key_tfstate_ente
    application_key_id = var.b2_application_key_id_tfstate_ente
  })
}
New policies for Vault were then defined. I used data source vault_policy_document to prepare policy documents without having to write them as multiline strings.
# Vault policy document (Vault token)
data "vault_policy_document" "auth_token" {
  rule {
    path         = "auth/token/create"
    capabilities = ["create", "update"]
    description  = "Allow creating child tokens"
  }
}

# Vault policy document (Terraform state)
data "vault_policy_document" "terraform_state" {
  rule {
    path         = data.vault_kv_secret.terraform_state.path
    capabilities = ["read"]
    description  = "Allow reading Terraform state information"
  }
  rule {
    path         = vault_kv_secret.application_key_tfstate_ente.path
    capabilities = ["read"]
    description  = "Allow reading B2 application key for writing Terraform state"
  }
}

# Vault policy document (Vault policy)
data "vault_policy_document" "acl" {
  rule {
    path         = "sys/policies/acl/museum"
    capabilities = ["create", "read", "update", "delete"]
    description  = "Allow creation of policy to access credentials for Museum"
  }
}

# Vault policy document (Museum)
data "vault_policy_document" "aws_museum" {
  rule {
    path         = "sys/mounts/auth/approle"
    capabilities = ["read"]
    description  = "Allow reading configuration of AppRole authentication method"
  }
  rule {
    path         = "kv/ente/aws/museum"
    capabilities = ["create", "read", "update", "delete"]
    description  = "Allow creation of credentials for Museum"
  }
  rule {
    path         = "kv/ente/cloudflare/certificate"
    capabilities = ["read"]
    description  = "Allow reading certificate and certificate key"
  }
  rule {
    path         = "auth/approle/role/museum"
    capabilities = ["create", "read", "update", "delete"]
    description  = "Allow creation of AppRole for Museum"
  }
  rule {
    path         = "auth/approle/role/museum/*"
    capabilities = ["create", "read", "update", "delete"]
    description  = "Allow access to AppRole information for Museum"
  }
}

# Vault policy document (Backblaze B2)
data "vault_policy_document" "b2_ente" {
  rule {
    path         = vault_kv_secret.application_key_b2.path
    capabilities = ["read"]
    description  = "Allow reading application key for Backblaze B2"
  }
  rule {
    path         = "kv/ente/b2/ente-b2"
    capabilities = ["create", "read", "update", "delete"]
    description  = "Allow creation of access credentials for Backblaze B2"
  }
}
The policy documents were then used to create actual Vault policies.
# Policy to grant creation of child tokens
resource "vault_policy" "auth_token" {
  name   = "terraform-vault-auth-token-ente"
  policy = data.vault_policy_document.auth_token.hcl
}

# Policy to grant access to Terraform state information
resource "vault_policy" "terraform_state" {
  name   = "terraform-state-ente"
  policy = data.vault_policy_document.terraform_state.hcl
}

# Policy to grant creation of a Vault role
resource "vault_policy" "acl" {
  name   = "terraform-vault-acl-ente"
  policy = data.vault_policy_document.acl.hcl
}

# Policy to write (Museum)
resource "vault_policy" "aws_museum" {
  name   = "terraform-aws-museum"
  policy = data.vault_policy_document.aws_museum.hcl
}

# Policy to write (Backblaze B2)
resource "vault_policy" "b2" {
  name   = "terraform-b2-ente"
  policy = data.vault_policy_document.b2_ente.hcl
}
Lastly, a role for the actual provisioning workflow to authenticate against was defined.
# Mount AWS authentication backend
data "vault_auth_backend" "aws" {
  path = "aws"
}

# Vault role for Terraform configurations
resource "vault_aws_auth_backend_role" "ente" {
  backend   = data.vault_auth_backend.aws.path
  role      = "terraform-ente"
  auth_type = "iam"
  token_policies = [
    vault_policy.auth_token.name,
    vault_policy.terraform_state.name,
    vault_policy.acl.name,
    vault_policy.aws_museum.name,
    vault_policy.b2.name
  ]
  bound_iam_principal_arns = [var.aws_role_arn]
}
Deploying with GitHub Actions
Defining GitHub Actions workflow was the last in step. There were some secrets that were needed before authenticating to Vault, which were added as repository secrets.
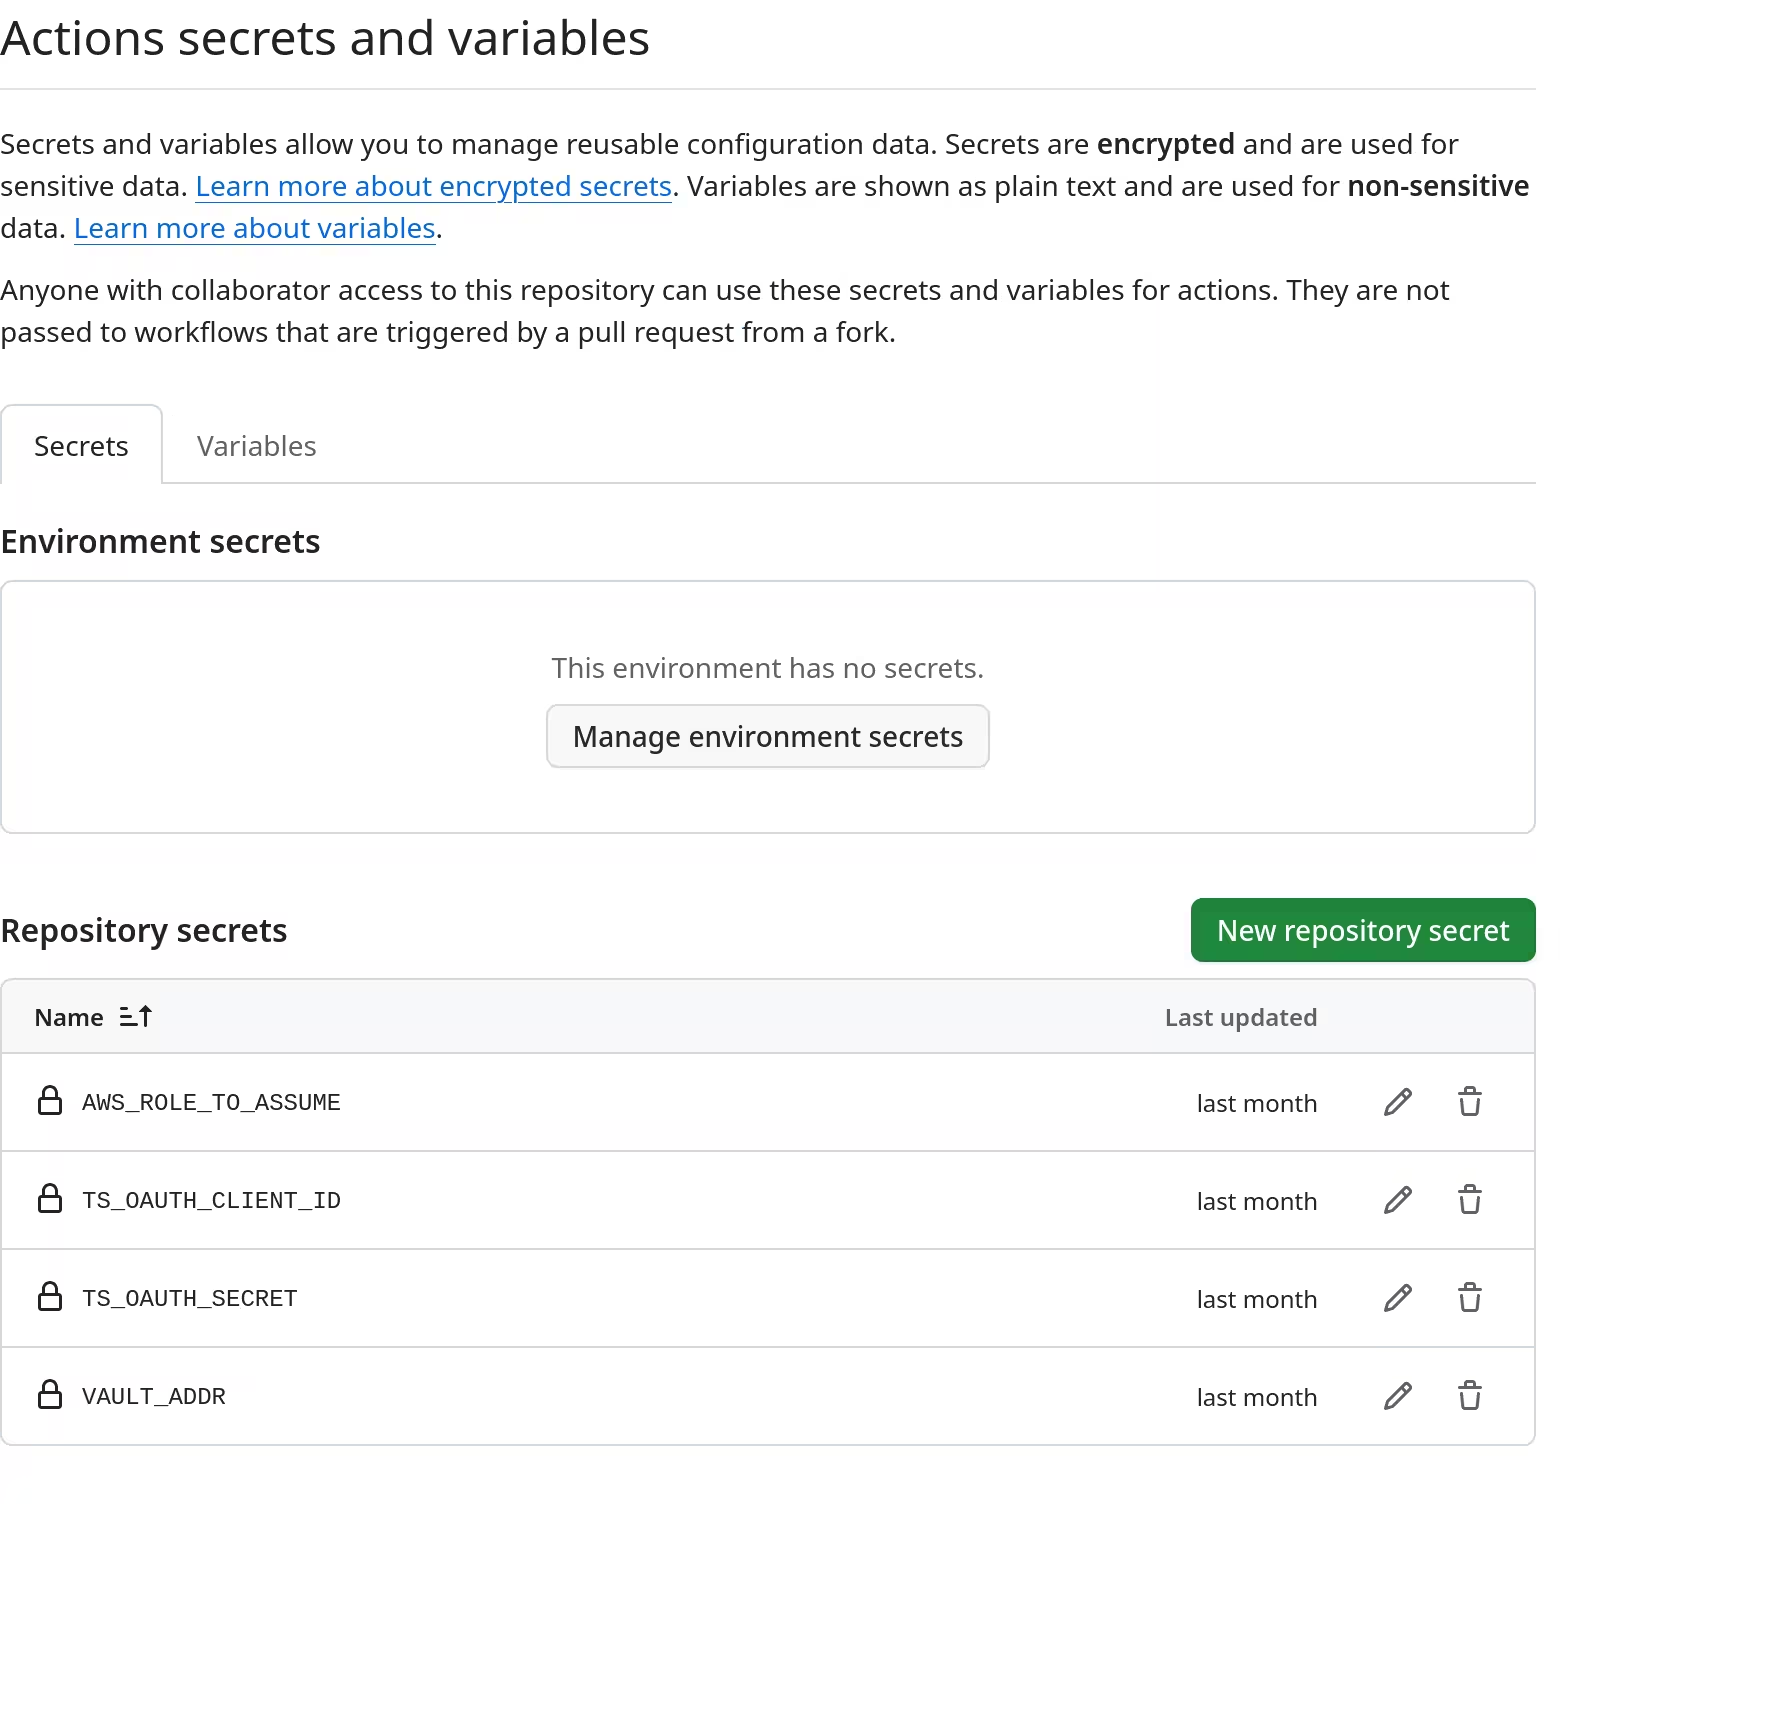
AWS_ROLE_TO_ASSUMEto the ARN of the IAM role created earlierTS_OAUTH_CLIENT_IDandTS_OAUTH_SECRETto a Tailscale OAuth client withauth_keysscope, which I have separately createdVAULT_ADDRto the address of the Vault instance
I wrote a workflow file afterwards, starting with some basic configurations. The secret VAULT_ADDR was set as an environment variable all throughout the deployment process.
name: Deploy Terraform configuration

on:
  push:
    branches:
      - main

jobs:
  deploy:
    runs-on: ubuntu-latest
    name: Deploy Terraform configuration
    permissions:
      id-token: write
    env:
      VAULT_ADDR: ${{ secrets.VAULT_ADDR }}

    steps:
For first steps, the runner was to authenticate to Tailscale and AWS.
- name: Set up Tailscale
  uses: tailscale/github-action@v3
  with:
    oauth-client-id: ${{ secrets.TS_OAUTH_CLIENT_ID }}
    oauth-secret: ${{ secrets.TS_OAUTH_SECRET }}
    tags: tag:ci

- name: Configure AWS credentials
  id: aws-credentials
  uses: aws-actions/configure-aws-credentials@v4
  with:
    aws-region: us-east-1
    role-to-assume: ${{ secrets.AWS_ROLE_TO_ASSUME }}
    output-credentials: true
    mask-aws-account-id: true
Vault was to be installed next. I wanted to use Vault's own GitHub Action, but support for AWS authentication method was not present at the time I was working on this; taking the naive approach, I followed an installation guide to install the software.
- name: Install Vault
  run: |
    wget -O - https://apt.releases.hashicorp.com/gpg | sudo gpg --dearmor -o /usr/share/keyrings/hashicorp-archive-keyring.gpg
    echo "deb [arch=$(dpkg --print-architecture) signed-by=/usr/share/keyrings/hashicorp-archive-keyring.gpg] https://apt.releases.hashicorp.com $(grep -oP '(?<=UBUNTU_CODENAME=).*' /etc/os-release || lsb_release -cs) main" | sudo tee /etc/apt/sources.list.d/hashicorp.list
    sudo apt-get update && sudo apt-get install vault
With Vault present, logging in to the service and reading some secrets, which are to be masked using add-mask workflow command, followed. Some were to be set as environment variables, and others as outputs that succeeding steps can refer to.
- name: Log in to Vault
  run: |
    vault login \
      -no-print \
      -method=aws \
      region=us-east-1 \
      role=terraform-ente-bootstrap \
      aws_access_key_id=${{ steps.aws-credentials.outputs.aws-access-key-id }} \
      aws_secret_access_key=${{ steps.aws-credentials.outputs.aws-secret-access-key }} \
      aws_security_token=${{ steps.aws-credentials.outputs.aws-session-token }}

- name: Get secrets from Vault
  id: vault-secrets
  run: |
    b2_application_key_id=$(vault kv get -field=b2_application_key_id -mount=kv ente/bootstrap)
    b2_application_key=$(vault kv get -field=b2_application_key -mount=kv ente/bootstrap)

    echo "::add-mask::$b2_application_key_id"
    echo "::add-mask::$b2_application_key"

    b2_state_application_key_id=$(vault kv get -field=b2_state_application_key_id -mount=kv ente/bootstrap)
    b2_state_application_key=$(vault kv get -field=b2_state_application_key -mount=kv ente/bootstrap)
    b2_state_bucket=$(vault kv get -field=b2_bucket -mount=kv ente/b2/tfstate-bootstrap)
    b2_state_endpoint=$(vault kv get -field=b2_endpoint -mount=kv ente/b2/tfstate-bootstrap)

    echo "::add-mask::$b2_state_application_key_id"
    echo "::add-mask::$b2_state_application_key"
    echo "::add-mask::$b2_state_bucket"
    echo "::add-mask::$b2_state_endpoint"

    echo "B2_APPLICATION_KEY_ID=$b2_application_key_id" >> $GITHUB_ENV
    echo "B2_APPLICATION_KEY=$b2_application_key" >> $GITHUB_ENV

    echo "b2-state-application-key-id=$b2_state_application_key_id" >> $GITHUB_OUTPUT
    echo "b2-state-application-key=$b2_state_application_key" >> $GITHUB_OUTPUT
    echo "b2-state-bucket=$b2_state_bucket" >> $GITHUB_OUTPUT
    echo "b2-state-endpoint=$b2_state_endpoint" >> $GITHUB_OUTPUT
After checking out the repository, setting up Terraform was next. Initialising Terraform would be done with secrets that were saved in Vault.
- uses: actions/checkout@v4
  with:
    ref: main

- name: Set up Terraform
  uses: hashicorp/setup-terraform@v3

- name: Terraform fmt
  id: terraform-fmt
  run: terraform fmt -check
  continue-on-error: true

- name: Terraform init
  id: terraform-init
  run: |
    terraform init \
      -backend-config="bucket=${{ steps.vault-secrets.outputs.b2-state-bucket }}" \
      -backend-config="endpoints={s3=\"${{ steps.vault-secrets.outputs.b2-state-endpoint }}\"}" \
      -backend-config="access_key=${{ steps.vault-secrets.outputs.b2-state-application-key-id }}" \
      -backend-config="secret_key=${{ steps.vault-secrets.outputs.b2-state-application-key }}" \
      -input=false

- name: Terraform validate
  id: terraform-validate
  run: terraform validate
Lastly, creating a plan and applying it would mark the end of the workflow.
- name: Terraform plan
  id: terraform-plan
  run: terraform plan -input=false -out=tfplan

- name: Terraform apply
  id: terraform-apply
  run: terraform apply -input=false tfplan
Deploying Ente (the imperative part)
Most of the access credentials and whatnot to deploy Ente was ready, but there were a few things that I ended up creating manually. Those resources, which are from Cloudflare and Tailscale, were either:
- complex to implement without knowing more about the provider's API specification
- impossible to apply, because every rule for my domain would then need to be managed by Terraform
- outright discouraging me to use one
- perfectly fine, but I was unable to motivate myself to manage one through Terraform
Preparing Cloudflare
Creating an API token
A token was needed to make DNS records. I could easily create one by going to the Cloudflare dashboard.
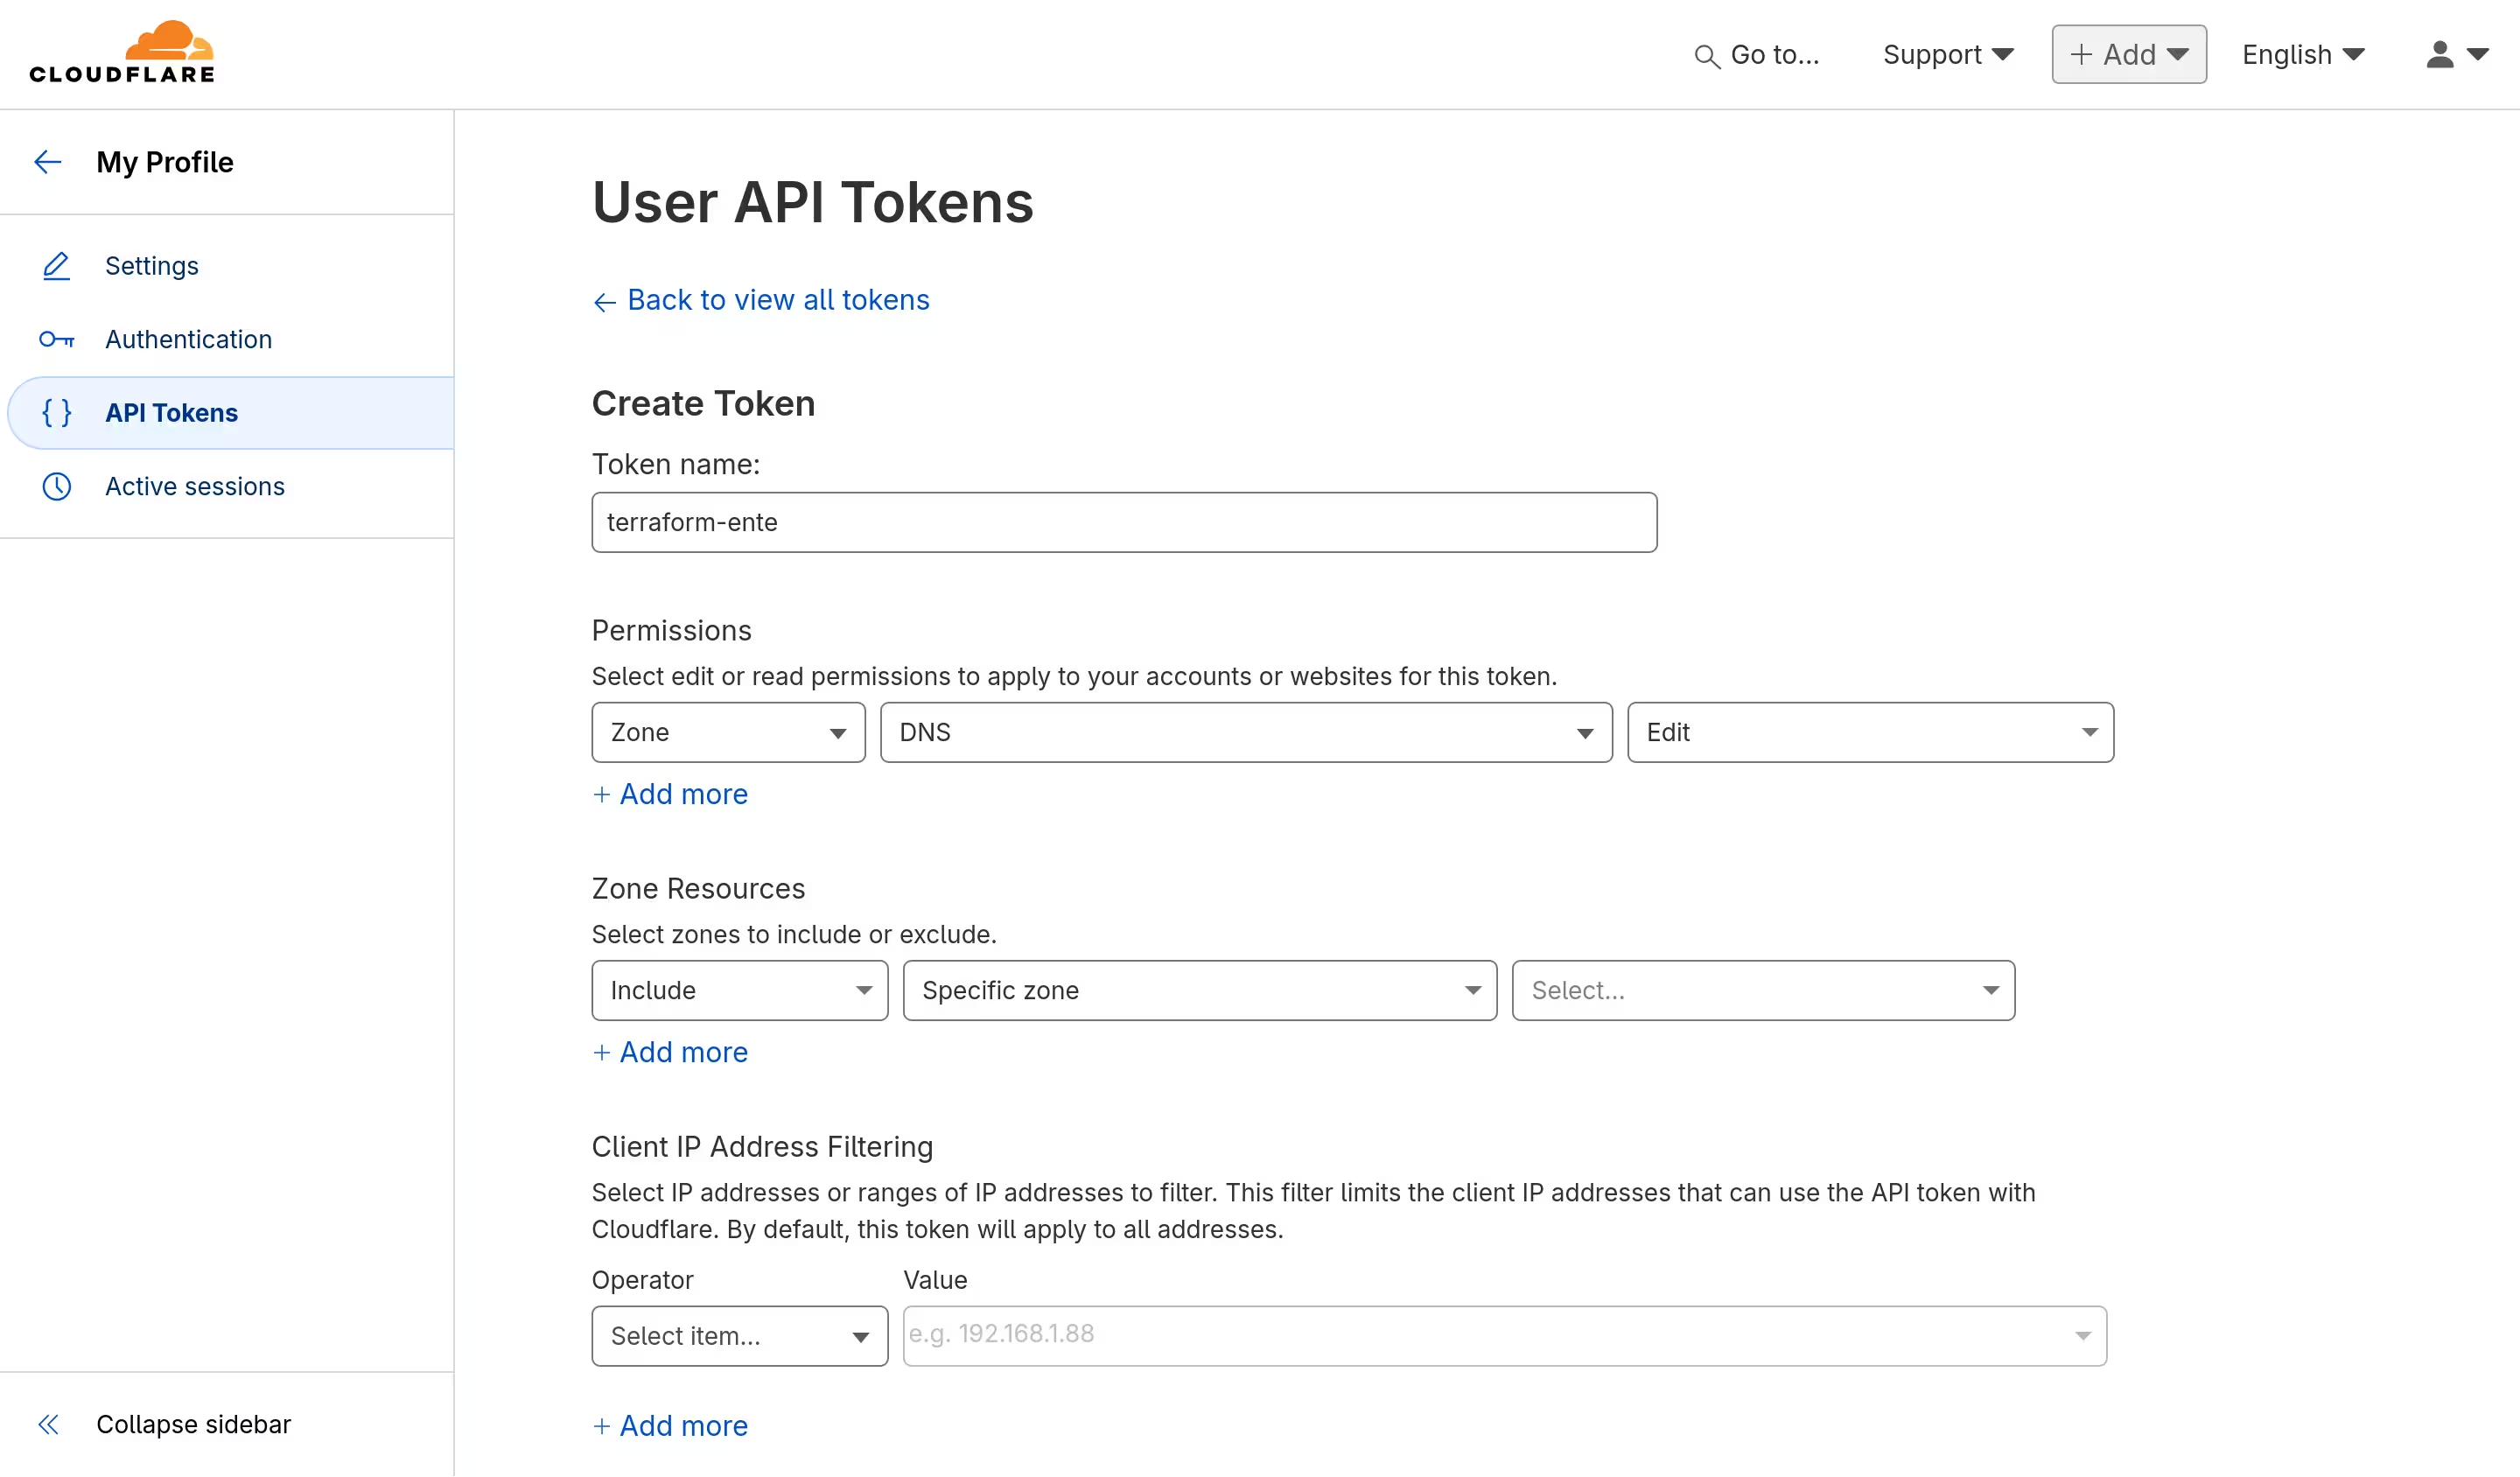
Creating an origin certificate
Using proxied DNS records from Cloudflare was something I could tolerate. With encryption mode for SSL/TLS also set as Full (strict), my method for achieving HTTPS support became a bit different from usual (which most likely involves Certbot).
The traffic between users and Cloudflare was already being encrypted, and I ensured the same was true for the traffic between Cloudflare and my server by creating an origin certificate.
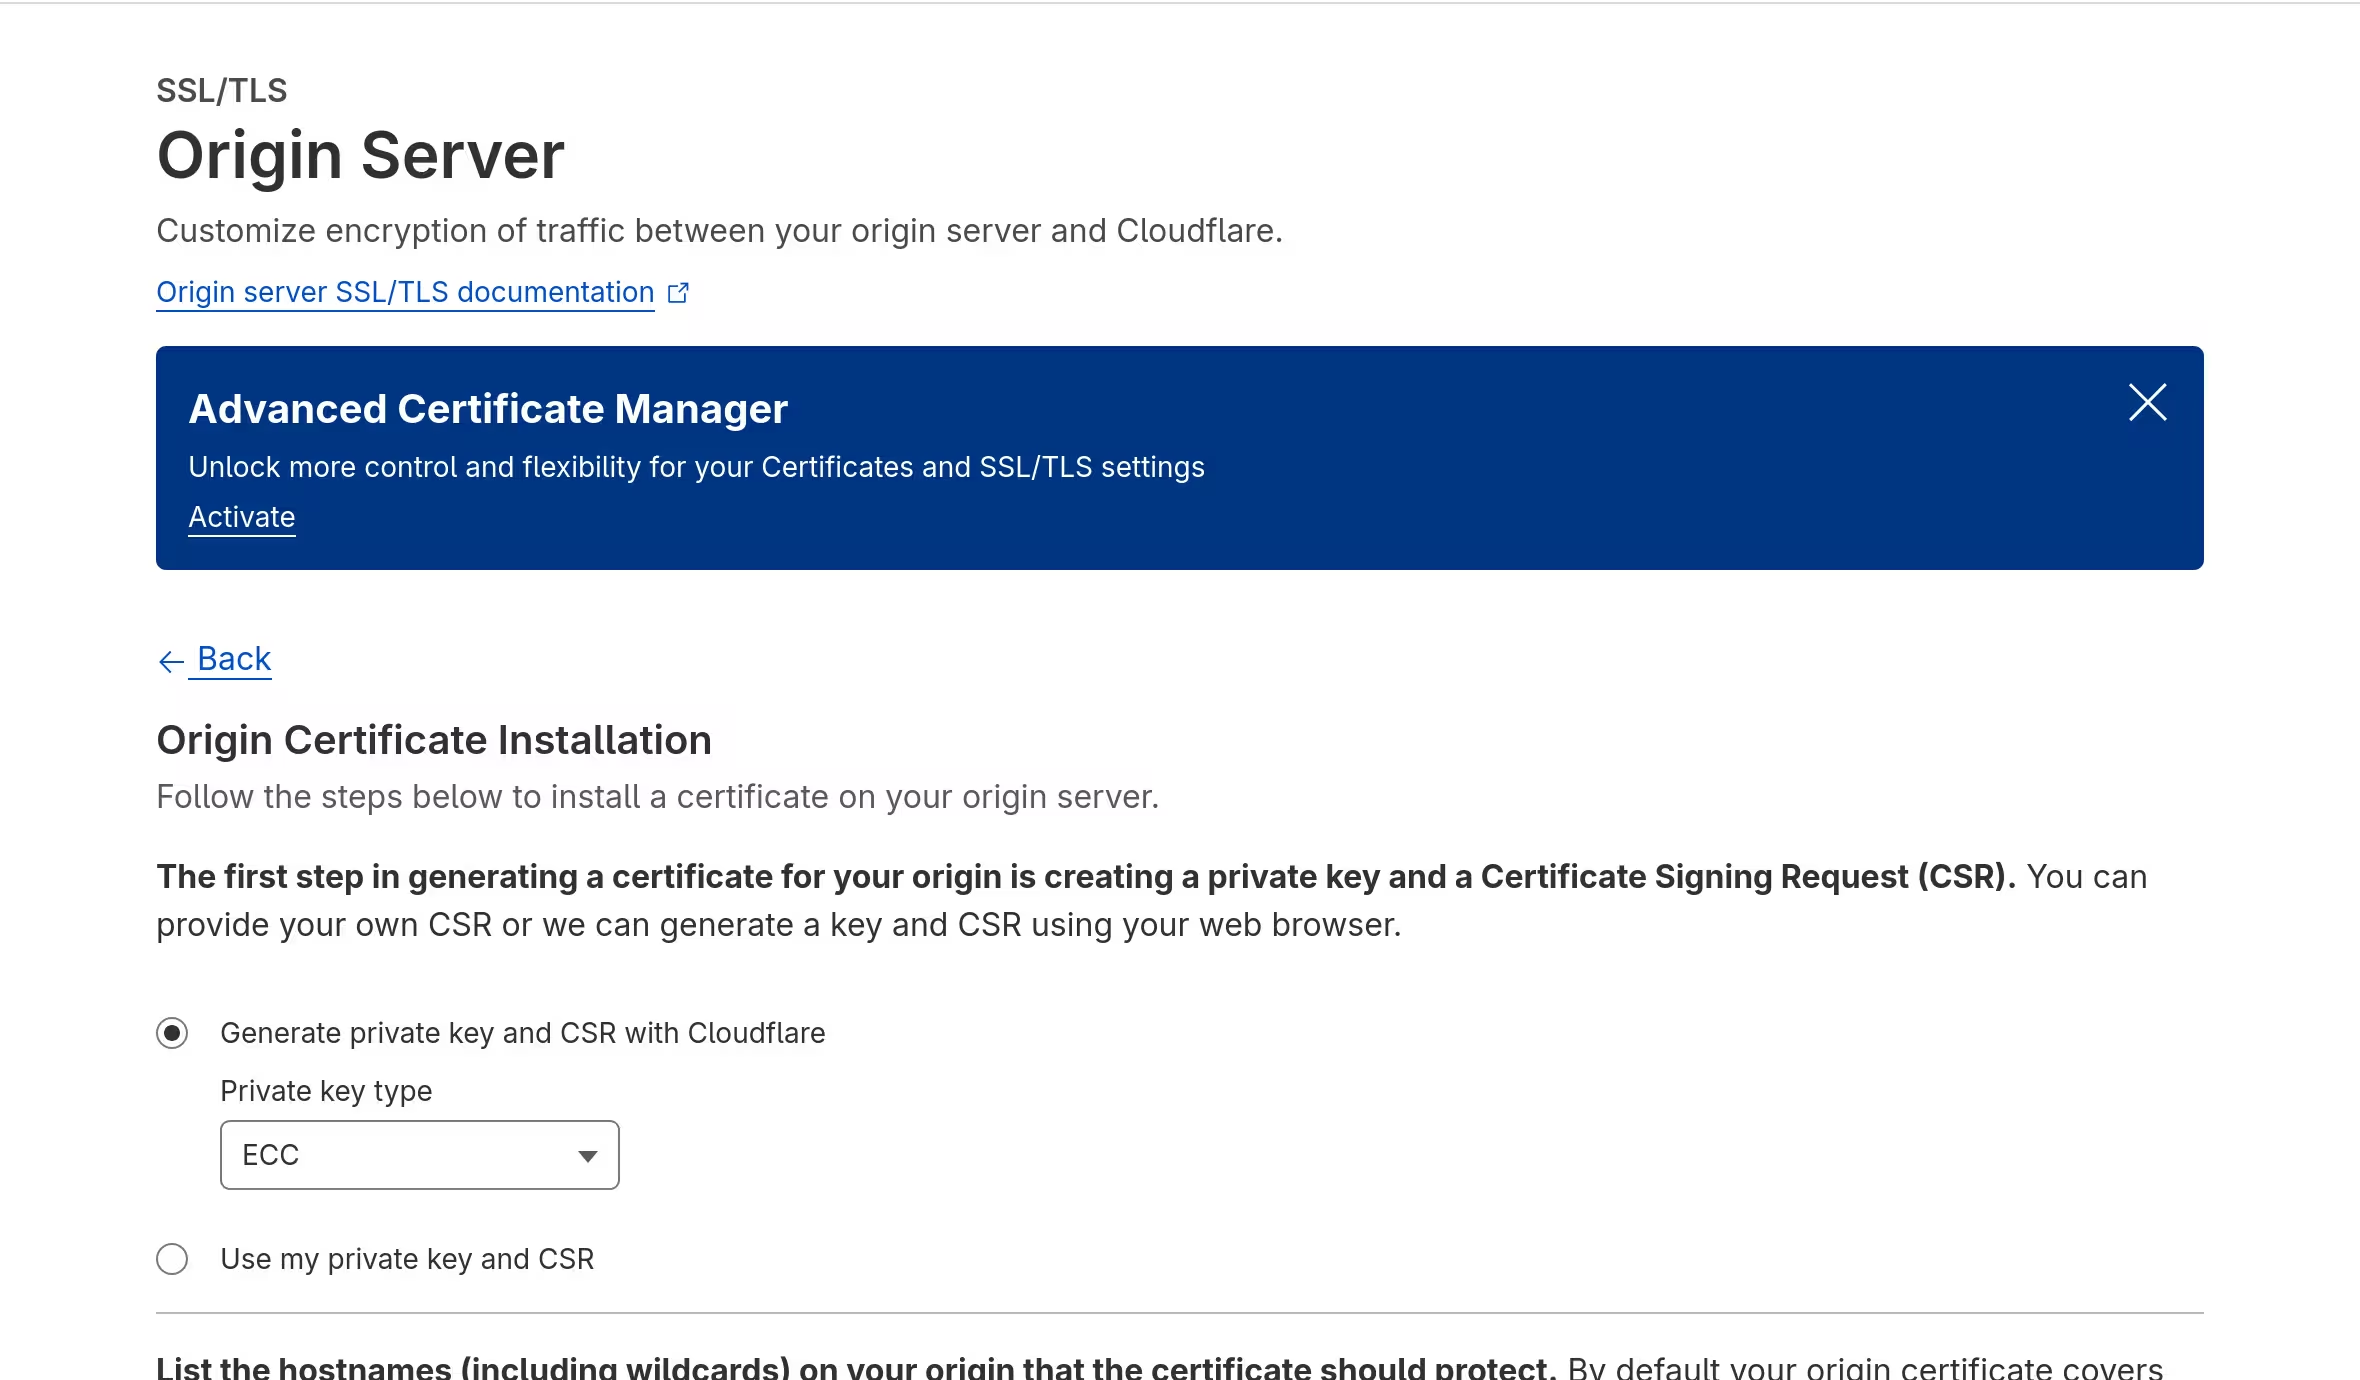
Hostnames included all subdomains that the service required. When one was created, the certificate, along with its private key, were saved into Vault.
[lyuk98@framework:~]$ edit certificate
[lyuk98@framework:~]$ edit certificate_key
[lyuk98@framework:~]$ vault kv put -mount=kv ente/cloudflare/certificate certificate=@certificate certificate_key=@certificate_key
Success! Data written to: kv/ente/cloudflare/certificate
Creating an OAuth client at Tailscale
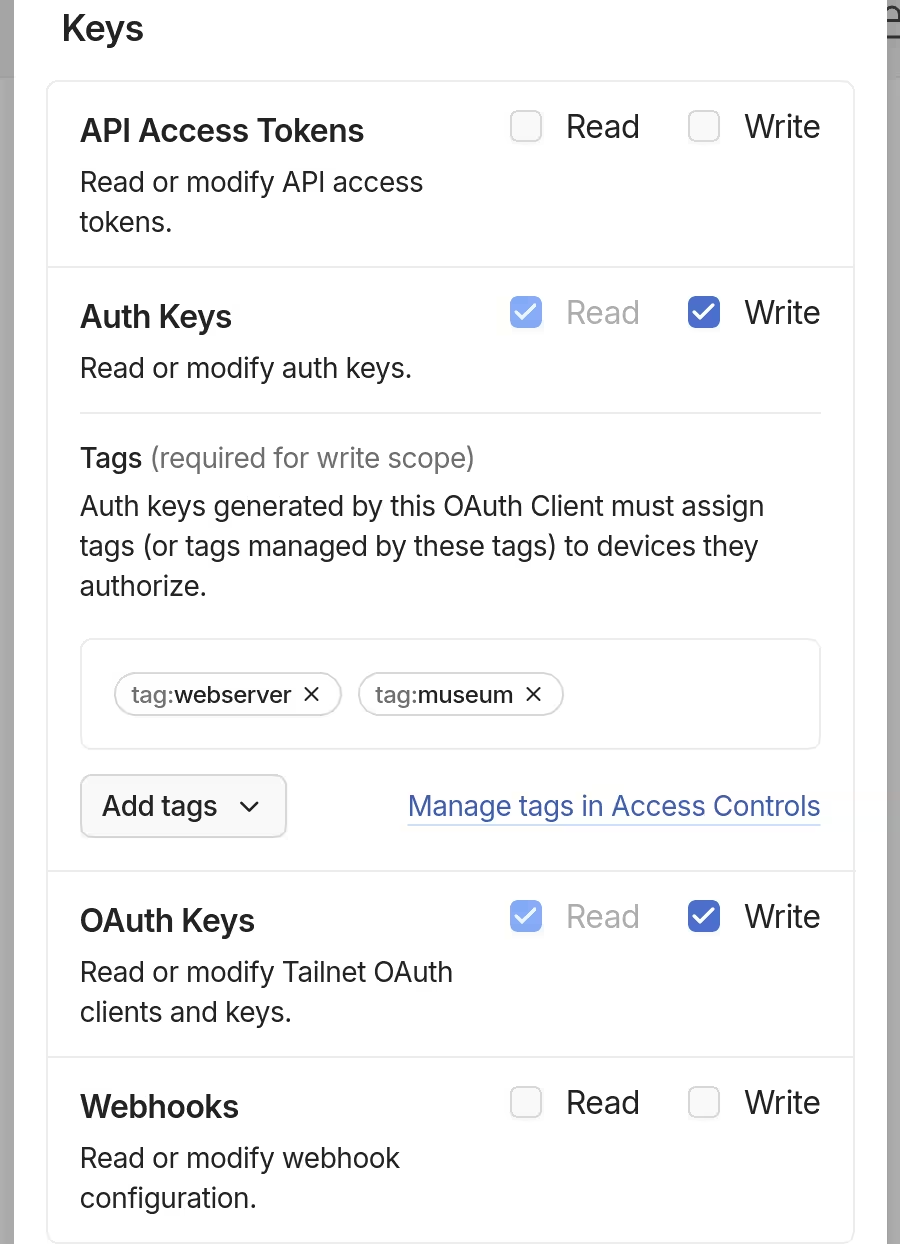
One was needed for Terraform to create what the instance itself will use to connect to the tailnet. The catch here, though, was that the scope (auth_keys) and tags (tag:webserver and tag:museum) that Museum itself will be using, on top of the scope needed to do the job (oauth_keys), were apparently needed.
Deploying Ente (the declarative part)
Writing Terraform configurations
Within a repository I have created, I wrote Terraform configurations for deploying Ente. Unlike the last time, I decided not to take the modular approach, instead using multiple files for each cloud provider.
Variables were first declared. They were later going to be provided via GitHub Actions.
variable "aws_region" {
  type        = string
  default     = "us-east-1"
  description = "AWS region"
  sensitive   = true
}

variable "cloudflare_zone_id" {
  type        = string
  description = "Zone ID for Cloudflare domain"
  sensitive   = true
}
Necessary providers were next in line. For Tailscale, the scopes that will be utilised during the deployment were required to be specified.
terraform {
  required_providers {
    aws = {
      source  = "hashicorp/aws"
      version = "~> 6.13"
    }
    b2 = {
      source  = "Backblaze/b2"
      version = "~> 0.10"
    }
    cloudflare = {
      source  = "cloudflare/cloudflare"
      version = "~> 5.10"
    }
    random = {
      source  = "hashicorp/random"
      version = "~> 3.7"
    }
    tailscale = {
      source  = "tailscale/tailscale"
      version = "~> 0.21"
    }
    vault = {
      source  = "hashicorp/vault"
      version = "~> 5.3"
    }
  }
}

provider "aws" {
  region = var.aws_region
}

provider "b2" {}

provider "cloudflare" {}

provider "random" {}

provider "tailscale" {
  scopes = ["oauth_keys", "auth_keys"]
}

provider "vault" {}
Backend configuration was almost the same with the bootstrapping configuration, except for the key.
terraform {
  backend "s3" {
    skip_credentials_validation = true
    skip_metadata_api_check     = true
    skip_region_validation      = true
    skip_requesting_account_id  = true
    region                      = "us-west-002"

    use_path_style = true
    key            = "terraform-ente.tfstate"
  }
}
Tailscale
The Tailscale provider was used to do one thing: creating an OAuth client for the server.
# Create a Tailscale OAuth client
resource "tailscale_oauth_client" "museum" {
  description = "museum"
  scopes      = ["auth_keys"]
  tags        = ["tag:museum", "tag:webserver"]
}
Backblaze B2
An object storage bucket for storing photos was declared. To make its name unique, a random suffix was appended. A CORS rule was added as well, since I was not able to download photos without it.
# Add random suffix to bucket name
resource "random_bytes" "bucket_suffix" {
  length = 4
}

# Add bucket for photo storage
resource "b2_bucket" "ente" {
  bucket_name = sensitive("ente-${random_bytes.bucket_suffix.hex}")
  bucket_type = "allPrivate"

  cors_rules {
    allowed_operations = [
      "s3_head",
      "s3_put",
      "s3_delete",
      "s3_post",
      "s3_get"
    ]
    allowed_origins = ["*"]
    cors_rule_name  = "ente-cors-rule"
    max_age_seconds = 3000
    allowed_headers = ["*"]
    expose_headers  = ["Etag"]
  }
}
For Ente to be able to access the bucket, an application key was also declared.
# Create application key for accessing the bucket
resource "b2_application_key" "ente" {
  capabilities = [
    "bypassGovernance",
    "deleteFiles",
    "listFiles",
    "readFiles",
    "shareFiles",
    "writeFileLegalHolds",
    "writeFileRetentions",
    "writeFiles"
  ]
  key_name  = "ente"
  bucket_id = b2_bucket.ente.bucket_id
}
Vault
Random bytes that are generated within Terraform were set to be saved into Vault.
# Encryption key for Museum
resource "random_bytes" "encryption_key" {
  length = 32
}

resource "random_bytes" "encryption_hash" {
  length = 64
}

# JWT secrets
resource "random_bytes" "jwt_secret" {
  length = 32
}

# Write secret containing connection details
resource "vault_kv_secret" "museum" {
  path = "kv/ente/aws/museum"
  data_json = jsonencode({
    key = {
      encryption = random_bytes.encryption_key.base64
      hash       = random_bytes.encryption_hash.base64
    }
    jwt = {
      secret = random_bytes.jwt_secret.base64
    }
  })
}
The same applied to the application key for the object storage, which the instance will be using.
# Write application key to Vault
resource "vault_kv_secret" "application_key" {
  path = "kv/ente/b2/ente-b2"
  data_json = jsonencode({
    key      = b2_application_key.ente.application_key_id
    secret   = b2_application_key.ente.application_key
    endpoint = data.b2_account_info.account.s3_api_url
    region   = "us-west-002"
    bucket   = b2_bucket.ente.bucket_name
  })
}
What followed was a policy granting access to the credentials as well as the origin certificate that I have manually created.
# Prepare policy document
data "vault_policy_document" "museum" {
  rule {
    path         = vault_kv_secret.museum.path
    capabilities = ["read"]
    description  = "Allow access to credentials for Museum"
  }
  rule {
    path         = vault_kv_secret.application_key.path
    capabilities = ["read"]
    description  = "Allow access to secrets for object storage"
  }
  rule {
    path         = "kv/ente/cloudflare/certificate"
    capabilities = ["read"]
    description  = "Allow access to TLS certificate data"
  }
}

# Write policy allowing Museum to read secrets
resource "vault_policy" "museum" {
  name   = "museum"
  policy = data.vault_policy_document.museum.hcl
}
Lastly, an AppRole and a SecretID for authorising Museum access to Vault was set to be created.
# Mount AppRole auth backend
data "vault_auth_backend" "approle" {
  path = "approle"
}

# Create an AppRole for Museum to retrieve secrets with
resource "vault_approle_auth_backend_role" "museum" {
  backend        = data.vault_auth_backend.approle.path
  role_name      = "museum"
  token_policies = [vault_policy.museum.name]
}

# Create a SecretID for the Vault AppRole
resource "vault_approle_auth_backend_role_secret_id" "museum" {
  backend   = vault_approle_auth_backend_role.museum.backend
  role_name = vault_approle_auth_backend_role.museum.role_name
}
Amazon Web Services
A Lightsail disk was declared to be used as PostgreSQL database storage.
# Create a persistent disk for PostgreSQL storage
resource "aws_lightsail_disk" "postgresql" {
  name              = "ente-postgresql"
  size_in_gb        = 8
  availability_zone = aws_lightsail_instance.museum.availability_zone
}
An SSH key pair was declared as well. This would later allow nixos-anywhere to access the host, but would no longer be used after the installation.
# Add a public SSH key
resource "aws_lightsail_key_pair" "museum" {
  name = "museum-key-pair"
}
A dual-stack Lightsail instance to host Ente was then specified. A small script (user_data) allows logging in as root via SSH, which is what nixos-anywhere currently assumes to be the case.
# Create a Lightsail instance
resource "aws_lightsail_instance" "museum" {
  name              = "museum"
  availability_zone = data.aws_availability_zones.available.names[0]
  blueprint_id      = "debian_12"
  bundle_id         = "small_3_0"
  key_pair_name     = aws_lightsail_key_pair.museum.name
  user_data         = "cp /home/admin/.ssh/authorized_keys /root/.ssh/authorized_keys"
}
With both the instance and the disk ready, the latter would be attached to the former. Choosing disk_path did not matter, since it is not recognised during installation and I had to resort to /dev/nvme1n1, anyway.
# Attach disk to the instance
resource "aws_lightsail_disk_attachment" "ente_postgresql" {
  disk_name     = aws_lightsail_disk.postgresql.name
  instance_name = aws_lightsail_instance.museum.name
  disk_path     = "/dev/xvdf"

  # Recreate disk attachment upon replacement of either the instance or the disk
  lifecycle {
    replace_triggered_by = [
      aws_lightsail_instance.museum.created_at,
      aws_lightsail_disk.postgresql.created_at
    ]
  }

  # Mark disk attachment dependent on the instance and the disk
  depends_on = [
    aws_lightsail_instance.museum,
    aws_lightsail_disk.postgresql
  ]
}
This attachment relied on names of dependencies, which do not change even if resources are replaced. Therefore, I manually added a condition to trigger a replacement. depends_on was also manually specified, so that the attachment will happen after the creation of both dependencies.
Three public ports (for SSH, HTTPS, and Tailscale) for the instance were declared afterwards.
# Open instance ports
resource "aws_lightsail_instance_public_ports" "museum" {
  instance_name = aws_lightsail_instance.museum.name

  # SSH
  port_info {
    protocol  = "tcp"
    from_port = 22
    to_port   = 22
  }

  # HTTPS
  port_info {
    protocol  = "tcp"
    from_port = 443
    to_port   = 443
  }

  # Tailscale
  port_info {
    protocol  = "udp"
    from_port = 41641
    to_port   = 41641
  }
}
Finally, nixos-anywhere was set up to install NixOS to the new Lightsail instance.
# Build the NixOS system configuration
module "nixos_system" {
  source    = "github.com/nix-community/nixos-anywhere//terraform/nix-build"
  attribute = "github:lyuk98/nixos-config#nixosConfigurations.museum.config.system.build.toplevel"
}

# Build the NixOS partition layout
module "nixos_partitioner" {
  source    = "github.com/nix-community/nixos-anywhere//terraform/nix-build"
  attribute = "github:lyuk98/nixos-config#nixosConfigurations.museum.config.system.build.diskoScript"
}

# Install NixOS to Lightsail instance
module "nixos_install" {
  source = "github.com/nix-community/nixos-anywhere//terraform/install"

  nixos_system      = module.nixos_system.result.out
  nixos_partitioner = module.nixos_partitioner.result.out

  target_host     = aws_lightsail_instance.museum.public_ip_address
  target_user     = aws_lightsail_instance.museum.username
  ssh_private_key = aws_lightsail_key_pair.museum.private_key

  instance_id = aws_lightsail_instance.museum.public_ip_address

  extra_files_script = "${path.module}/deploy-secrets.sh"
  extra_environment = {
    MODULE_PATH                   = path.module
    VAULT_ROLE_ID                 = vault_approle_auth_backend_role.museum.role_id
    VAULT_SECRET_ID               = vault_approle_auth_backend_role_secret_id.museum.secret_id
    TAILSCALE_OAUTH_CLIENT_ID     = tailscale_oauth_client.museum.id
    TAILSCALE_OAUTH_CLIENT_SECRET = tailscale_oauth_client.museum.key
  }
}
The extra_files_script was specified to save secrets that will be used to unlock Vault. I passed the data as extra_environment, which the script would later pick up as environment variables.
Secrets are written inside /persist since it is where persistent data are saved with impermanence applied.
#!/usr/bin/env bash

install --directory --mode 751 persist/var/lib/secrets

secrets_dir="$MODULE_PATH/secrets"
mkdir --parents "$secrets_dir"

echo -n $VAULT_ROLE_ID > "$secrets_dir/vault-role-id"
echo -n $VAULT_SECRET_ID > "$secrets_dir/vault-secret-id"
echo -n $TAILSCALE_OAUTH_CLIENT_ID > "$secrets_dir/tailscale-oauth-client-id"
echo -n $TAILSCALE_OAUTH_CLIENT_SECRET > "$secrets_dir/tailscale-oauth-client-secret"

install --mode 600 \
  "$secrets_dir/vault-role-id" \
  "$secrets_dir/vault-secret-id" \
  "$secrets_dir/tailscale-oauth-client-id" \
  "$secrets_dir/tailscale-oauth-client-secret" \
  persist/var/lib/secrets
I edited the script and made sure the GitHub Actions runner can execute it.
[lyuk98@framework:~/terraform-ente]$ edit deploy-secrets.sh
[lyuk98@framework:~/terraform-ente]$ chmod +x deploy-secrets.sh
Cloudflare
DNS records to access various parts of the service were defined. I initially wanted to use second-level subdomains (such as albums.ente.<domain>), but later realised that Cloudflare's Universal SSL certificate only covers root and first-level subdomains. Purchasing Advanced Certificate Manager was not ideal, so I ended up using first-level subdomains (like ente-albums.<domain>).
The following subdomains were defined:
ente-accounts: Ente Accountsente-cast: Ente Castente-albums: Ente Albumsente-photos: Ente Photosente-api: Ente API, also known as Museum
An A record was written like the following:
# A record for Ente accounts
resource "cloudflare_dns_record" "accounts" {
  name    = "ente-accounts"
  ttl     = 1
  type    = "A"
  zone_id = data.cloudflare_zone.ente.zone_id
  content = aws_lightsail_instance.museum.public_ip_address
  proxied = true
}
AAAA records were written as well. What attribute contains the Lightsail instance's public IPv6 address was not clear by reading the provider's documentation, but using ipv6_addresses worked.
# AAAA record for Ente albums
resource "cloudflare_dns_record" "albums_aaaa" {
  name    = "ente-albums"
  ttl     = 1
  type    = "AAAA"
  zone_id = data.cloudflare_zone.ente.zone_id
  content = aws_lightsail_instance.museum.ipv6_addresses[0]
  proxied = true
}
Writing NixOS configurations
I started by copying existing configuration from the Vault instance.
Modifying the disko configuration
The disko configuration was more or less the same, except the additional storage disk that I had to accommodate. I enabled compression (like I did to other partitions) to save space.
{
  disko.devices = {
    disk = {

      # Primary disk...

      # Secondary storage for persistent data
      storage = {
        type = "disk";
        device = "/dev/nvme1n1";

        # GPT (partition table) as the disk's content
        content = {
          type = "gpt";

          # List of partitions
          partitions = {
            # PostgreSQL storage
            postgresql = {
              size = "100%";

              content = {
                type = "btrfs";

                mountpoint = "/var/lib/postgresql";
                mountOptions = [
                  "defaults"
                  "compress=zstd"
                ];
              };
            };
          };
        };
      };
    };

    # tmpfs root follows...
  };
}
Accessing secrets with Vault
Using Vault within NixOS required me to set up a service that would fetch secrets. I could see a few choices, but I went for one from Determinate Systems. It runs Vault Agent under the hood, and injects secrets into existing systemd services. Since the NixOS module that implements Ente uses one for hosting, it was a perfect way to integrate Vault in my case.
At flake.nix, I added an input for the Vault service.
{
  # Flake description...

  inputs = {
    # Preceding inputs...

    # NixOS Vault service
    nixos-vault-service = {
      url = "github:DeterminateSystems/nixos-vault-service";
      inputs.nixpkgs.follows = "nixpkgs";
    };
  };

  # Flake outputs follow...
}
I then wrote a module vault-agent.nix, importing the module for Vault Agent as a start.
imports = [ inputs.nixos-vault-service.nixosModules.nixos-vault-service ];
Vault is licensed under Business Source License, making it source-available but non-free. Hydra does not build unfree software, so I had to build it manually. It also meant that I had to specifically allow it to be used at all.
# Allow unfree package (Vault)
nixpkgs.config.allowUnfreePredicate =
  pkg:
  builtins.elem (lib.getName pkg) [
    "vault"
    "vault-bin"
  ];
During the testing, building Vault took more than how long I could tolerate and sometimes even failed. A binary version fortunately exists, but the module by Determinate Systems was hardcoded to use the source version. To circumvent this problem, I added an overlay to Nixpkgs, essentially telling anyone who uses vault (the source version) to use vault-bin (the binary version) instead.
# Use binary version of Vault to avoid building the package
nixpkgs.overlays = [
  (final: prev: { vault = prev.vault-bin; })
];
(vault-bin technically still builds but does so by fetching binary from HashiCorp)
Configuration for Vault Agent was added next. I referred to available options to set up the Vault address and auto-authentication, where I used AppRole method in this case.
detsys.vaultAgent = {
  defaultAgentConfig = {
    # Preceding Vault configuration...
    auto_auth.method = [
      {
        type = "approle";
        config = {
          remove_secret_id_file_after_reading = false;
          role_id_file_path = "/var/lib/secrets/vault-role-id";
          secret_id_file_path = "/var/lib/secrets/vault-secret-id";
        };
      }
    ];
  };

  # systemd services follow...
};
Properties role_id_file_path and secret_id_file_path refer to files that Terraform will provide during deployment.
I provided templates, which contains nothing else but the secret itself, for the agent to use while writing files with fetched secrets. I noticed that Nginx also wants an SSL certificate for hosts that it will serve, so it was taken into consideration.
detsys.vaultAgent = {
  # Vault Agent config...

  systemd.services = {
    ente = {
      # Enable Vault integration with Museum
      enable = true;

      secretFiles = {
        # Restart the service in case secrets change
        defaultChangeAction = "restart";

        # Get secrets from Vault
        files = {
          s3_key.template = ''
            {{ with secret "kv/ente/b2/ente-b2" }}{{ .Data.key }}{{ end }}
          '';
          s3_secret.template = ''
            {{ with secret "kv/ente/b2/ente-b2" }}{{ .Data.secret }}{{ end }}
          '';
          s3_endpoint.template = ''
            {{ with secret "kv/ente/b2/ente-b2" }}{{ .Data.endpoint }}{{ end }}
          '';
          s3_region.template = ''
            {{ with secret "kv/ente/b2/ente-b2" }}{{ .Data.region }}{{ end }}
          '';
          s3_bucket.template = ''
            {{ with secret "kv/ente/b2/ente-b2" }}{{ .Data.bucket }}{{ end }}
          '';

          key_encryption.template = ''
            {{ with secret "kv/ente/aws/museum" }}{{ .Data.key.encryption }}{{ end }}
          '';
          key_hash.template = ''
            {{ with secret "kv/ente/aws/museum" }}{{ .Data.key.hash }}{{ end }}
          '';
          jwt_secret.template = ''
            {{ with secret "kv/ente/aws/museum" }}{{ .Data.jwt.secret }}{{ end }}
          '';

          "tls.cert".template = ''
            {{ with secret "kv/ente/cloudflare/certificate" }}{{ .Data.certificate }}{{ end }}
          '';
          "tls.key".template = ''
            {{ with secret "kv/ente/cloudflare/certificate" }}{{ .Data.certificate_key }}{{ end }}
          '';
        };
      };
    };

    nginx = {
      # Enable Vault integration with Nginx
      enable = true;

      secretFiles = {
        # Reload unit in case secrets change
        defaultChangeAction = "reload";

        # Get secrets from Vault
        files = {
          certificate.template = ''
            {{ with secret "kv/ente/cloudflare/certificate" }}{{ .Data.certificate }}{{ end }}
          '';
          certificate-key.template = ''
            {{ with secret "kv/ente/cloudflare/certificate" }}{{ .Data.certificate_key }}{{ end }}
          '';
        };
      };
    };
  };
};
Lastly, with Vault behind the tailnet, I made sure the affected services start after the instance can connect to the secret storage.
# Start affected services after tailscaled starts since it is needed to connect to Vault
systemd.services =
  lib.genAttrs
    [
      "ente"
      "nginx"
    ]
    (name: {
      after = [ config.systemd.services.tailscaled-autoconnect.name ];
    });
Connecting to the tailnet
The Museum-specific Tailscale configuration remained unchanged, except for three things: the hostname, the advertised tags, and the path to the OAuth client secret.
{
  # Apply host-specific Tailscale configurations
  services.tailscale = {
    # Provide auth key to issue `tailscale up` with
    authKeyFile = "/var/lib/secrets/tailscale-oauth-client-secret";

    # Enable Tailscale SSH and advertise tags
    extraUpFlags = [
      "--advertise-tags=tag:museum,tag:webserver"
      "--hostname=museum"
      "--ssh"
    ];

    # Use routing features for servers
    useRoutingFeatures = "server";
  };
}
Configuring Ente
I roughly followed a quickstart guide with a few changes:
- Secrets are from Vault Agent
credentials-dir, where Ente will read the SSL certificate from, was set to the parent directory of service-specific secretss3.b2-eu-cen.are_local_bucketswas set tofalsebecause it obviously is not
services.ente = {
  # Preceding configurations...

  api = {
    # Preceding API configurations...

    settings =
      let
        files = config.detsys.vaultAgent.systemd.services.ente.secretFiles.files;
      in
      {
        # Get credentials from where the certificate is
        credentials-dir = builtins.dirOf files."tls.cert".path;

        # Manage object storage settings
        s3 = {
          b2-eu-cen = {
            # Indicate that this is not a local MinIO bucket
            are_local_buckets = false;

            # Set sensitive values
            key._secret = files.s3_key.path;
            secret._secret = files.s3_secret.path;
            endpoint._secret = files.s3_endpoint.path;
            region._secret = files.s3_region.path;
            bucket._secret = files.s3_bucket.path;
          };
        };

        # Manage key-related settings
        key = {
          encryption._secret = files.key_encryption.path;
          hash._secret = files.key_hash.path;
        };
        jwt.secret._secret = files.jwt_secret.path;

        # Internal settings...
      };
  };
};
The SSL certificate was then once again provided to Nginx.
services.nginx = {
  # Use recommended proxy settings
  recommendedProxySettings = true;

  virtualHosts =
    let
      domains = config.services.ente.web.domains;
      secrets = config.detsys.vaultAgent.systemd.services.nginx.secretFiles.files;
    in
    lib.genAttrs
      [
        domains.api
        domains.accounts
        domains.cast
        domains.albums
        domains.photos
      ]
      (name: {
        # Add certificates to supported endpoints
        sslCertificate = secrets.certificate.path;
        sslCertificateKey = secrets.certificate-key.path;
      });
};
The GitHub Actions workflow
Repository secrets were first added to the new repository.
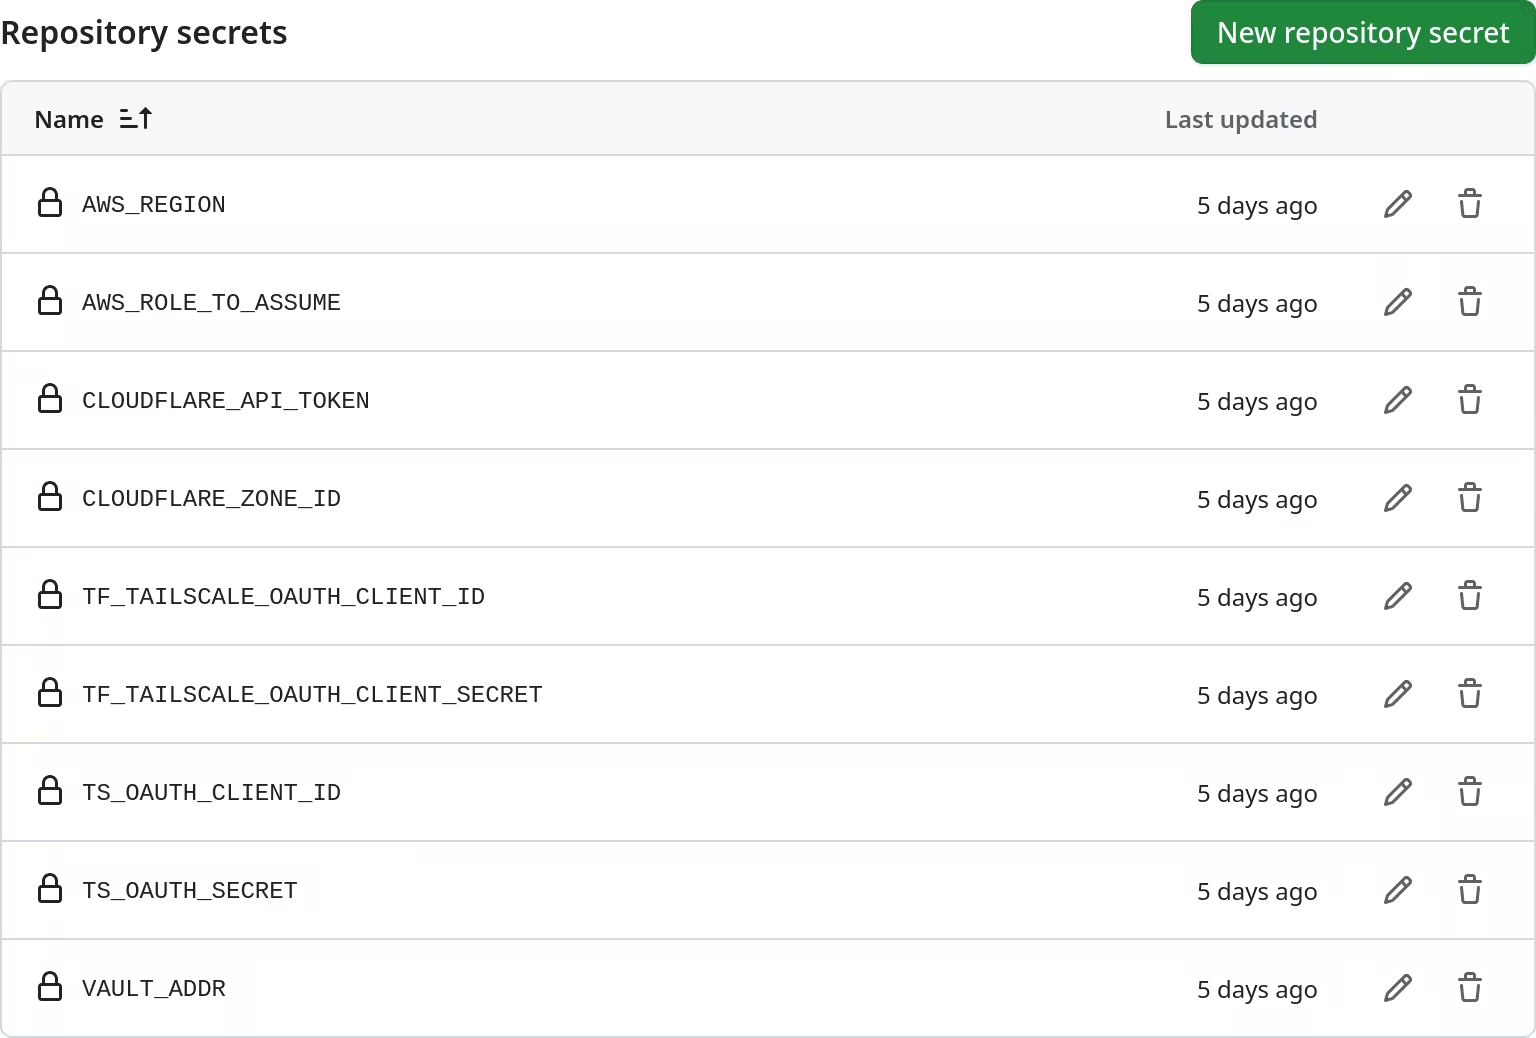
AWS_REGIONis used to specify where to deploy Lightsail resources to.AWS_ROLE_TO_ASSUMEis an ARN of the role that the workflow will assume during deployment.CLOUDFLARE_API_TOKENis, obviously, a token for accessing Cloudflare API.CLOUDFLARE_ZONE_IDis an ID representing my zone (or domain).TF_TAILSCALE_OAUTH_CLIENT_IDandTF_TAILSCALE_OAUTH_CLIENT_SECRETare used by Terraform to create resources at Tailscale.TS_OAUTH_CLIENT_IDandTS_OAUTH_SECRET, unlike the abovementioned OAuth client, are only used to establish connection to the tailnet, and thus Vault.VAULT_ADDRsets where to look for Vault.
A workflow file for GitHub Actions was created. Almost everything was copied over from the bootstrapping stage, except for a few things.
First, more environment variables were declared using the new secrets.
jobs:
  deploy:
    runs-on: ubuntu-latest
    name: Deploy Terraform configuration
    permissions:
      id-token: write
    env:
      VAULT_ADDR: ${{ secrets.VAULT_ADDR }}

      TAILSCALE_OAUTH_CLIENT_ID: ${{ secrets.TF_TAILSCALE_OAUTH_CLIENT_ID }}
      TAILSCALE_OAUTH_CLIENT_SECRET: ${{ secrets.TF_TAILSCALE_OAUTH_CLIENT_SECRET }}
      CLOUDFLARE_API_TOKEN: ${{ secrets.CLOUDFLARE_API_TOKEN }}

      TF_VAR_aws_region: ${{ secrets.AWS_REGION }}
      TF_VAR_cloudflare_zone_id: ${{ secrets.CLOUDFLARE_ZONE_ID }}

    steps:
      # Deployment steps...
Authentication to AWS and subsequently Vault remains the same, but a step was added to install Nix to the environment. It was needed for installing NixOS using nixos-anywhere.
- name: Install Nix
  uses: cachix/install-nix-action@v31
Application keys for Backblaze B2 are then fetched from Vault. Except for the location of the secrets, what happens remains the same with the bootstrapping workflow.
- name: Get secrets from Vault
  id: vault-secrets
  run: |
    b2_application_key_id=$(vault kv get -field=b2_application_key_id -mount=kv ente/bootstrap)
    b2_application_key=$(vault kv get -field=b2_application_key -mount=kv ente/bootstrap)

    echo "::add-mask::$b2_application_key_id"
    echo "::add-mask::$b2_application_key"

    b2_state_application_key_id=$(vault kv get -field=b2_state_application_key_id -mount=kv ente/bootstrap)
    b2_state_application_key=$(vault kv get -field=b2_state_application_key -mount=kv ente/bootstrap)
    b2_state_bucket=$(vault kv get -field=b2_bucket -mount=kv ente/b2/tfstate-bootstrap)
    b2_state_endpoint=$(vault kv get -field=b2_endpoint -mount=kv ente/b2/tfstate-bootstrap)

    echo "::add-mask::$b2_state_application_key_id"
    echo "::add-mask::$b2_state_application_key"
    echo "::add-mask::$b2_state_bucket"
    echo "::add-mask::$b2_state_endpoint"

    echo "B2_APPLICATION_KEY_ID=$b2_application_key_id" >> $GITHUB_ENV
    echo "B2_APPLICATION_KEY=$b2_application_key" >> $GITHUB_ENV

    echo "b2-state-application-key-id=$b2_state_application_key_id" >> $GITHUB_OUTPUT
    echo "b2-state-application-key=$b2_state_application_key" >> $GITHUB_OUTPUT
    echo "b2-state-bucket=$b2_state_bucket" >> $GITHUB_OUTPUT
    echo "b2-state-endpoint=$b2_state_endpoint" >> $GITHUB_OUTPUT
The remainder of the workflow definition are the same, but what it will actually do greatly differ with the changes in Terraform configuration.
The manual deployment
While I could let GitHub Actions set everything up, I did not want it to do so for tens of minutes. I instead let my personal computer, which probably has more resources allocated than how much the remote runner does, do exactly that.
Environment variables were first set, just like how it is done automatically.
[lyuk98@framework:~/terraform-ente]$ export CLOUDFLARE_API_TOKEN=<API token>
[lyuk98@framework:~/terraform-ente]$ # Other environment variables...
Some tools were then made available to the shell environment. For some reason, nixos-anywhere expects jq to be present, so it was also added.
[lyuk98@framework:~/terraform-ente]$ nix shell nixpkgs#awscli2 nixpkgs#jq
Access to AWS was granted differently, since I cannot do so using OIDC.
[lyuk98@framework:~/terraform-ente]$ aws sso login
I already had access to Vault prior to this, so another authentication was not necessary.
The step for getting secrets was mostly copied over.
[lyuk98@framework:~/terraform-ente]$ b2_application_key_id=$(vault kv get -field=application_key_id -mount=kv ente/b2/terraform-b2-ente)
[lyuk98@framework:~/terraform-ente]$ b2_application_key=$(vault kv get -field=application_key -mount=kv ente/b2/terraform-b2-ente)
[lyuk98@framework:~/terraform-ente]$ b2_state_application_key_id=$(vault kv get -field=application_key_id -mount=kv ente/b2/tfstate-ente)
[lyuk98@framework:~/terraform-ente]$ b2_state_application_key=$(vault kv get -field=application_key -mount=kv ente/b2/tfstate-ente)
[lyuk98@framework:~/terraform-ente]$ b2_state_bucket=$(vault kv get -field=b2_bucket -mount=kv ente/b2/tfstate-bootstrap)
[lyuk98@framework:~/terraform-ente]$ b2_state_endpoint=$(vault kv get -field=b2_endpoint -mount=kv ente/b2/tfstate-bootstrap)
[lyuk98@framework:~/terraform-ente]$ export B2_APPLICATION_KEY_ID=$b2_application_key_id
[lyuk98@framework:~/terraform-ente]$ export B2_APPLICATION_KEY=$b2_application_key
Using the credentials from the earlier step, terraform init was performed.
[lyuk98@framework:~/terraform-ente]$ terraform init \
  -backend-config="bucket=$b2_state_bucket" \
  -backend-config="endpoints={s3=\"$b2_state_endpoint\"}" \
  -backend-config="access_key=$b2_state_application_key_id" \
  -backend-config="secret_key=$b2_state_application_key" \
  -input=false
Subsequently, the changes in infrastructure were planned and then applied.
[lyuk98@framework:~/terraform-ente]$ terraform plan -input=false -out=tfplan
[lyuk98@framework:~/terraform-ente]$ terraform apply -input=false tfplan
Installing NixOS took a while, which output was hidden due to sensitive values, but it eventually finished after a little less than ten minutes.
Post-installation configurations
After a few months I have started working on this, Ente was finally running. I visited the photos page (with the ente-photos subdomain) and created an account.
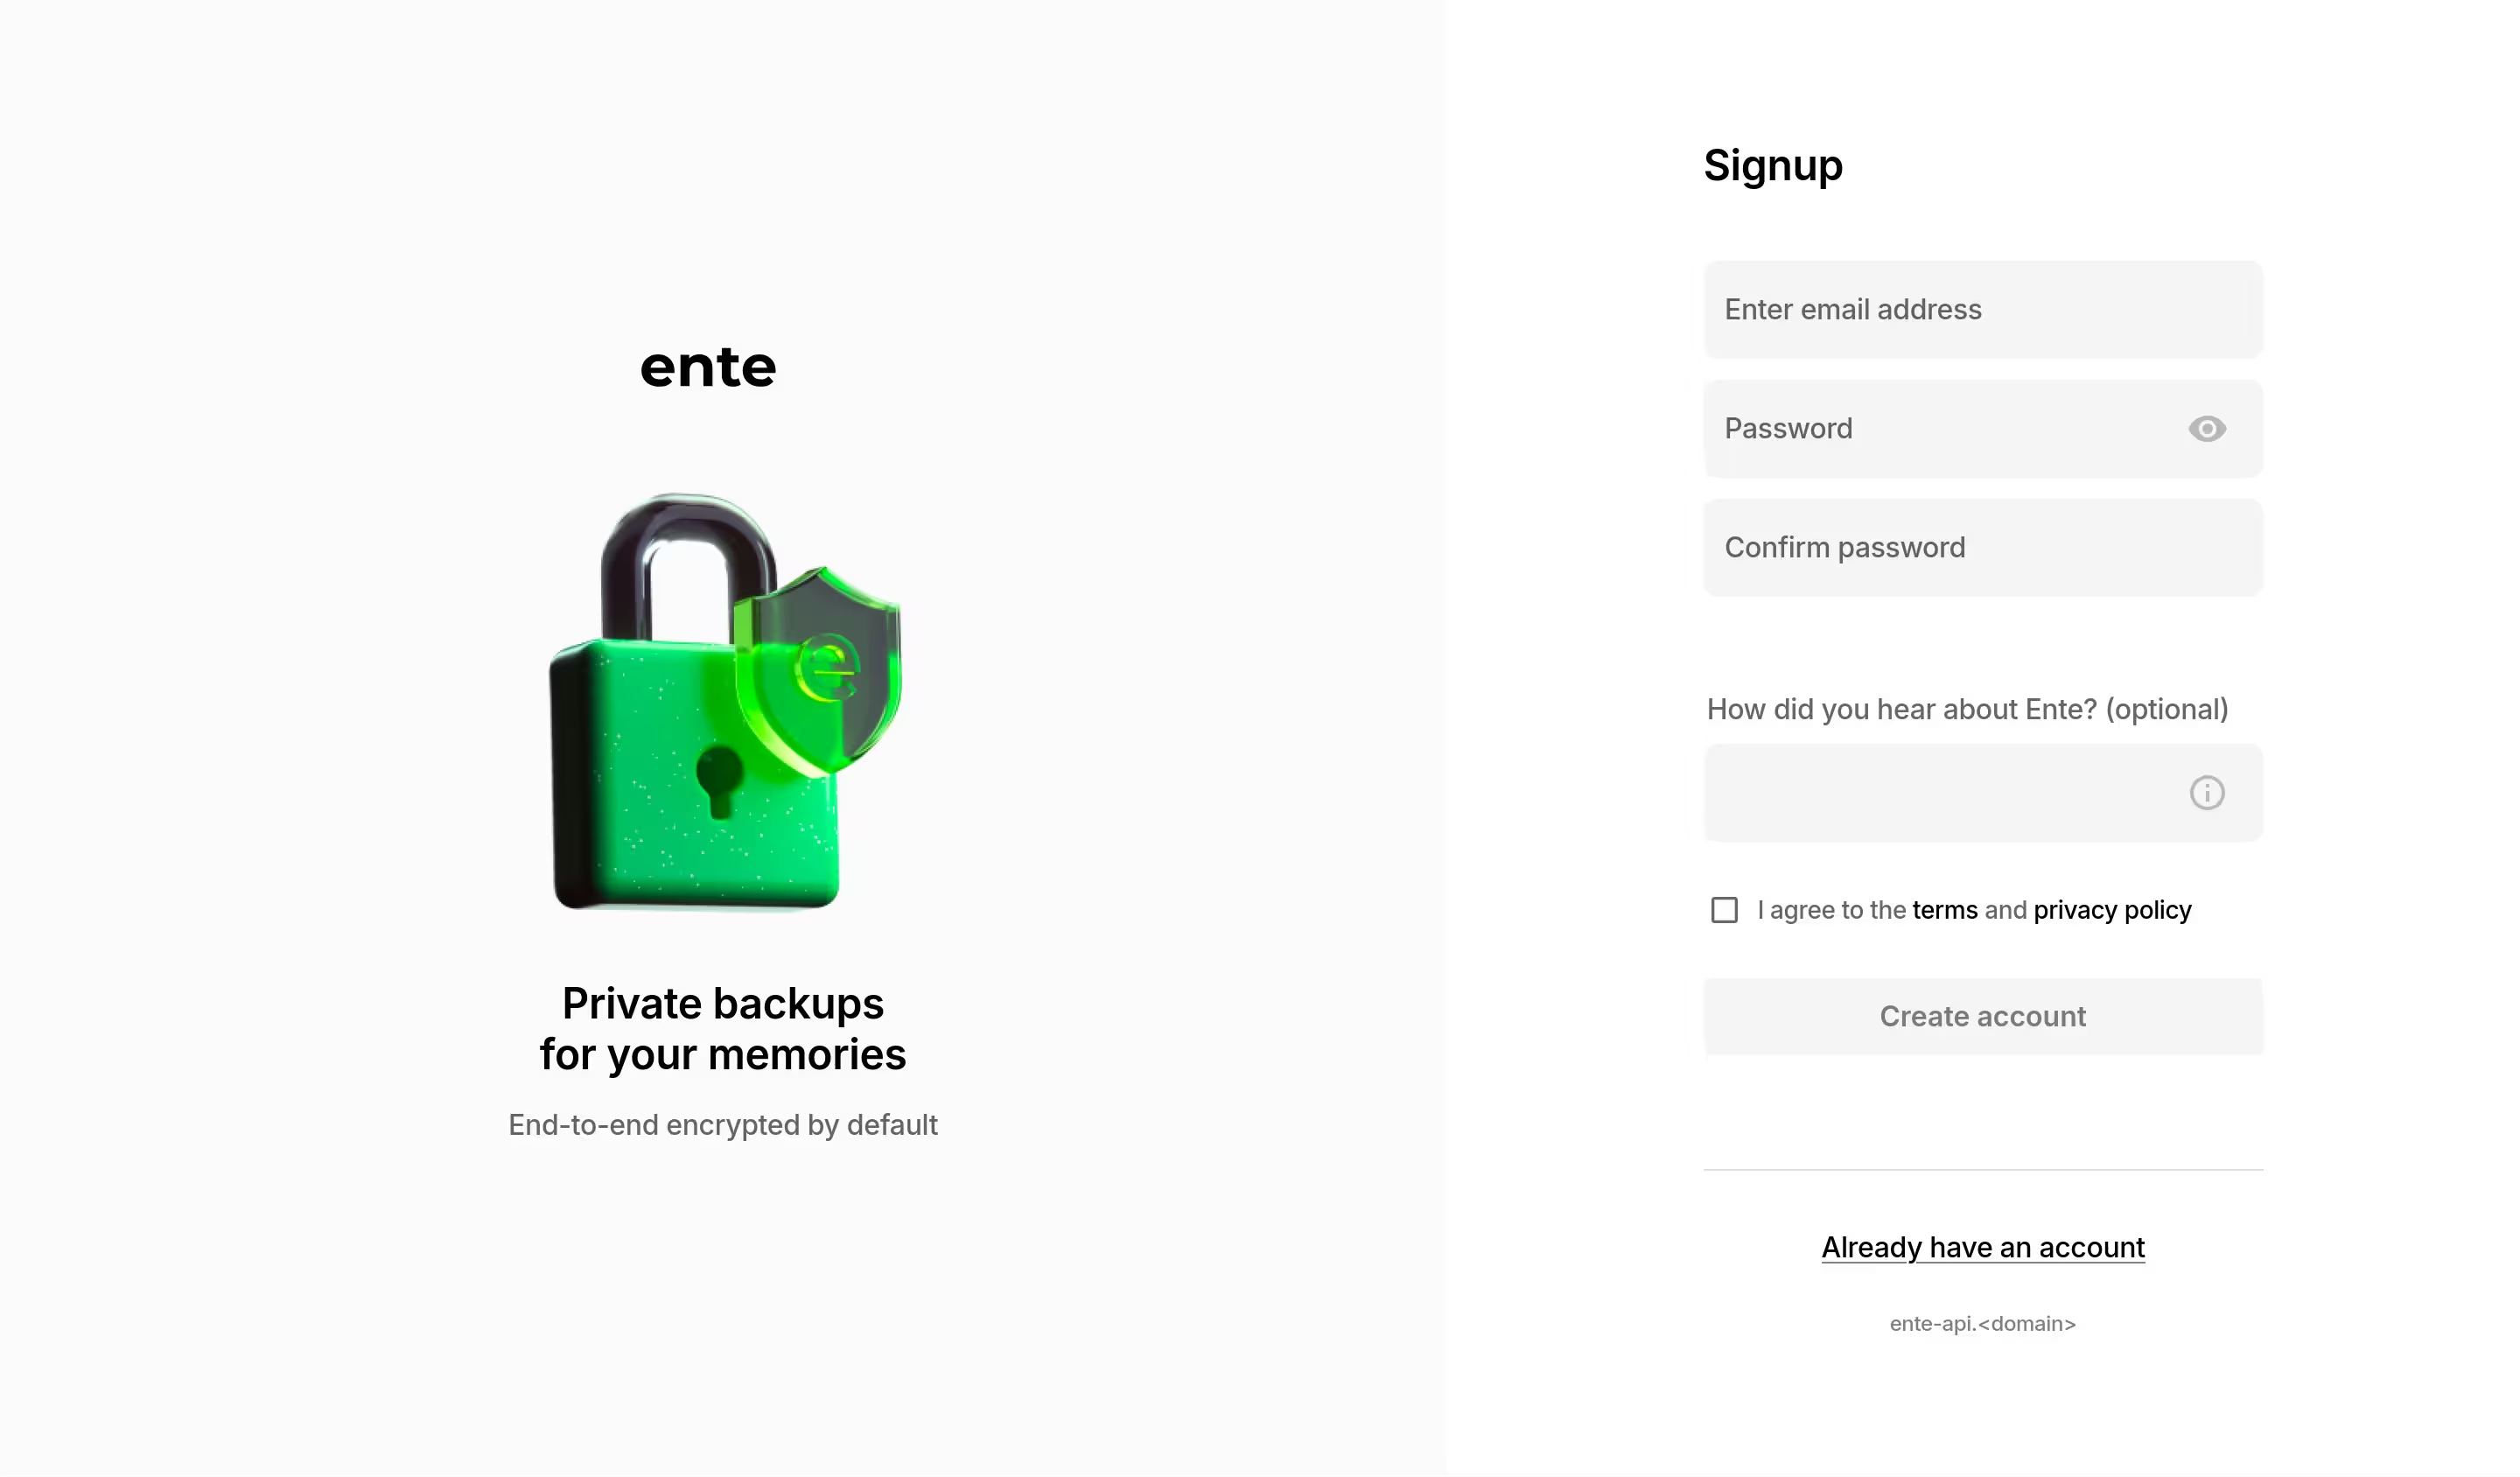
The email service was not set up, so no verification code was sent to my email address. Like how the guide pointed out, I searched the journal to view the code.
[root@museum:~]# journalctl --unit ente.service
The registration was complete afterwards, and photos were now ready to be backed up.
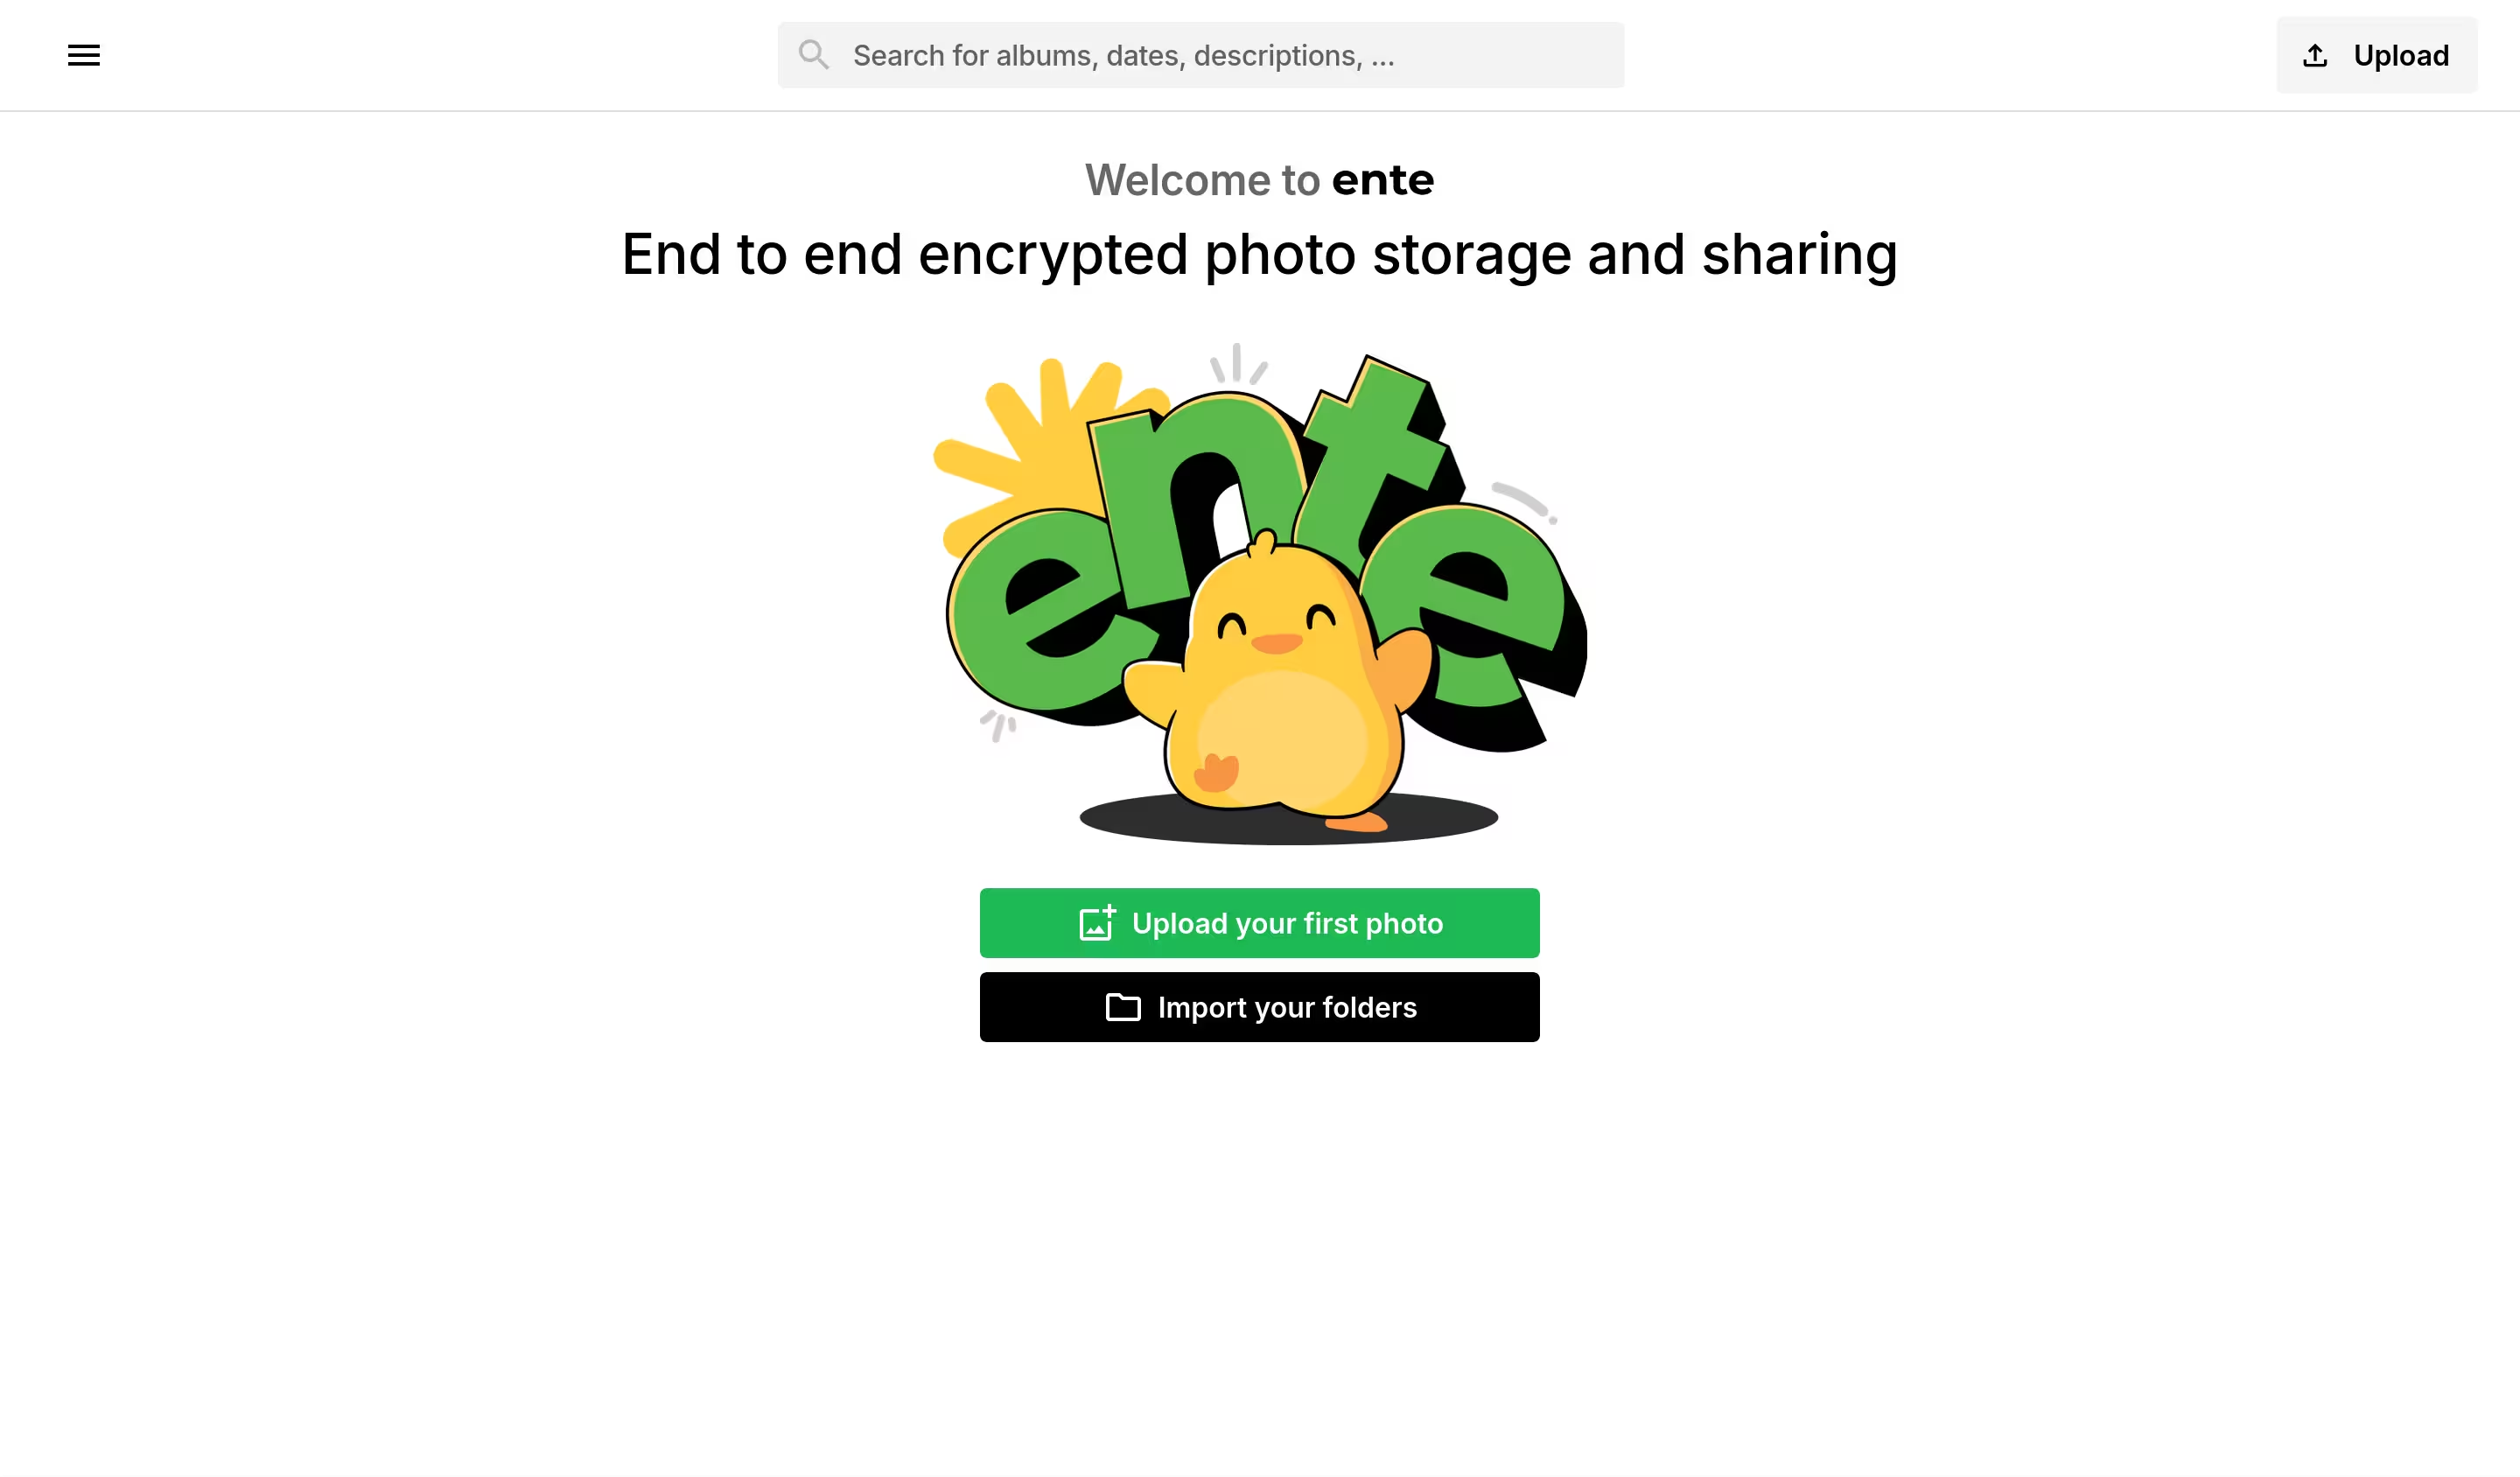
However, my account was under a free plan, which had a quota of 10 gigabytes. It was certainly not enough for me, but I could increase the limit to 100 terabytes using Ente CLI.
To manage users' subscription, I had to become an administrator first. The user ID was needed, and while the official guide looks through the database to figure it out, I found it easier to upload a few photos and have a look at the object storage bucket.
[lyuk98@framework:~]$ backblaze-b2 ls b2://<Ente bucket>/
The only entry from the result was my user ID. It was added to my NixOS configuration.
services.ente.api.settings.internal.admin = <user ID>;
The change in configuration was applied afterwards.
[lyuk98@framework:~/nixos-config]$ nixos-rebuild switch --target-host root@museum --flake .#museum
It was now time to work with the CLI. I wrote ~/.ente/config.yaml to specify a custom API endpoint and added my account.
[lyuk98@framework:~]$ nix shell nixpkgs#ente-cli
[lyuk98@framework:~]$ mkdir --parents ~/.ente
[lyuk98@framework:~]$ cat > ~/.ente/config.yaml
endpoint:
  api: https://ente-api.<domain>
[lyuk98@framework:~]$ ente account add
My account was then upgraded using ente admin update-subscription.
[lyuk98@framework:~]$ ente admin update-subscription \
  --admin-user <email> \
  --user <email> \
  --no-limit True
Finishing up
It was a long journey for me to reach this far. I have just started using NixOS when I started working on this; it took a while to start thinking declaratively, but I feel better knowing a bit more about it by experiencing declarative resource management.
Improvements are, in my opinion, still necessary. Being a Terraform first-timer, there may be some best practices I missed out on. I also feel like many steps were still done manually, which I wish to lessen next time.
Lastly, there are a few concerns that I was aware of, but decided not to act upon:
A note on OpenTofu (and OpenBao)
Earlier in this post, I briefly touched on HashiCorp's switch to Business Source License that affects Terraform and Vault. While I do not consider myself to be affected by the change, since I am not working on a commercial product that will "compete with" the company, it still came to me as an uncertainty to the future of the infrastructure-as-code tool.
OpenTofu, which started as a fork of Terraform, naturally came to my attention. I did not write the code with interoperability in mind, but I still tried it out on my project, repeating the manual deployment process earlier.
[lyuk98@framework:~/terraform-ente]$ nix shell nixpkgs#opentofu nixpkgs#jq
[lyuk98@framework:~/terraform-ente]$ # Populate variables...
[lyuk98@framework:~/terraform-ente]$ tofu init \
  -backend-config="bucket=$b2_state_bucket" \
  -backend-config="endpoints={s3=\"$b2_state_endpoint\"}" \
  -backend-config="access_key=$b2_state_application_key_id" \
  -backend-config="secret_key=$b2_state_application_key" \
  -input=false \
  -reconfigure
[lyuk98@framework:~/terraform-ente]$ tofu plan -input=false -out=tfplan
[lyuk98@framework:~/terraform-ente]$ tofu apply -input=false tfplan
To my surprise, everything worked as expected. If it does not result in compromising something important (like security), keeping interoperability, while not a priority, could still be on my scope. However, if I were to use the open-source counterpart, I would definitely consider trying out state file encryption.
Unlike OpenTofu, though, I have not given much attention to OpenBao, a fork of Vault, because it apparently lacks AWS authentication method that I rely on.
Keeping instances up to date
With Vault and Museum, there are now three NixOS hosts that I manage declaratively. All of them need to stay up to date, and though I can manually do it for now, I thought it would be a natural thing to consider automating such a process. A project I came across, comin, apparently achieves the goal, but I could not find a way to offload configuration builds to a faster machine during the limited time I took to learn about the project.
However, an interesting feature it mentioned was "Prometheus metrics". I had no practical experience with it, but integrating it seemed like a nice idea on paper. If I am motivated enough, I may be working on it in the future.